To perform a good halt at any level, your relationship with your horse must have a solid foundation of trust and understanding. In the following article, the first of two parts, I’ll explain how to develop that foundation. Next month, I’ll describe the different expectations you should have of your horse in the halt at the various stages of his training, and I’ll share a few exercises to help you achieve those expectations.
Ground Rules to Gaining Trust
In dressage, the halt is the only movement without movement. Asking a horse to stand still contradicts his natural flight instinct. Although he needs to remain “forward-thinking”—ready to respond immediately to your aids—he also needs
to be relaxed and quiet in his body. In every step of his training, therefore, you must earn his complete trust by showing him that nothing bad will ever happen in the halt. To do this, discipline yourself with the following rules:
• Solve one problem at a time. Because we have so many goals in perfecting halts—making them square, straight,
still, etc.—we tend to confuse our horses with multiple, conflicting aids. Concentrate on one goal at a time and wait for that lesson to sink in before asking anything new of your horse.
• Be patient. As I’ll explain later, perfecting the halt is a gradual process that takes years of training. Balance, straightness, squareness and self-carriage improve over time as a result of correct dressage training.
• Be consistent. If your horse doesn’t respond properly to correct aids the first time, don’t change your aids and, thus, confuse him further. Instead, repeat the same aids each time you halt. Eventually, he’ll connect the right response with the reward you give him-praise, pats, treats.
• Practice, but don’t drill. Timing is crucial in achieving good halts, and the only way to perfect them is with practice. However, your horse will learn to resent the halt if you make him do it 50 times a ride. So limit your halt practices to just a few times a week, and, within each session, practice 10 halts or fewer.
• Never use the whip as punishment. Use it only to increase sensitivity to the forward driving aids. Using it during the halt may destroy your horse’s confidence and relaxation.
• Never halt a horse when he’s frightened, especially if the source of fear is behind him. Doing this will cause him to associate fear with halting.
• Never halt a horse from a high speed. This is very hard on his legs and can cause injuries and sour his attitude toward halting. Instead, “downshift” in stages. For example, if you are at extended canter, make a transition to medium canter, then collected canter, before halting.
Stages of Riding the Halt
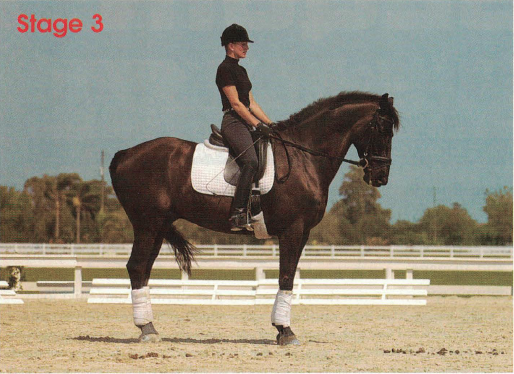
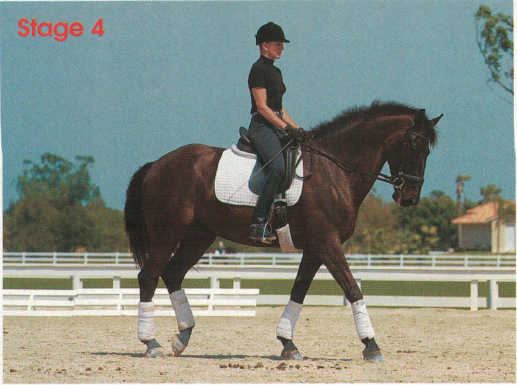
In a horse’s early work, I rarely practice halts, except to mount and dismount (see sidebar, “Establishing a Safe Place”). With a young horse, you first must establish a clear pattern in which adding your legs simply means go forward and taking the reins means slow down or stop. Then focus on his balance, straightness and acceptance of the bit within the three gaits and the transitions between them. Once you’ve achieved these goals and also can perform basic half halts, you’re ready to start refining full halts.
In your training at home, only school the halt when your horse feels as balanced, attentive and prepared as he can be. If he doesn’t feel quite ready, try a slightly less difficult transition instead. For instance, if you planned to halt from the canter, ask for a nice canter-trot or canter-walk transition. This should help improve his balance and responsiveness to your aids, better preparing him for future halts.
Just like any other movement in dressage, the halt requires careful preparation. Rather than thinking, “How do I put on the brakes?” divide each halt into the following four stages:
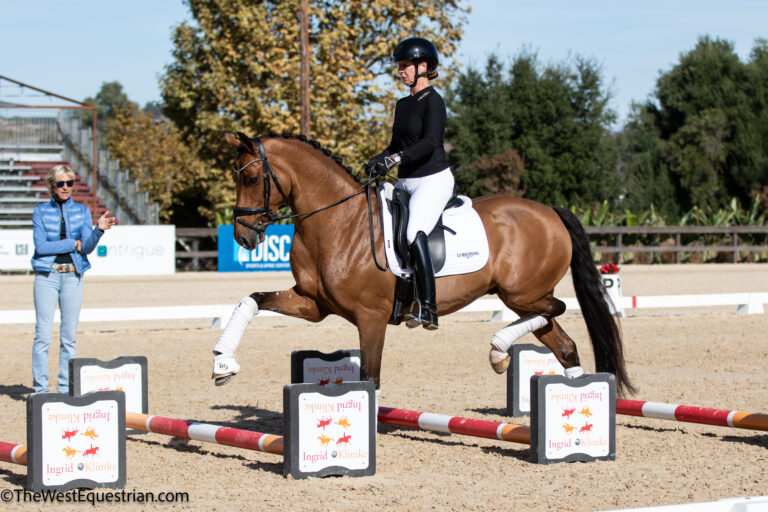
1. Maximize the quality of the gait. In this example, I’ll describe riding a halt from the trot (working tempo for a low-level horse, collected trot for an advanced horse). Think of riding your horse from back to front, generating energy with your legs and containing it with your reins. If he feels as if he’s running off with you, practice trot-walk transitions and half halts to make him more responsive to your rein aids. On the other hand, if you have to constantly pump and kick to keep him moving forward, try to engage his hindquarters more with trot-canter transitions and transitions within the trot, lengthening and shortening the steps until he moves forward without hesitation when you put your leg on. In all of your work, think of increasing
your horse’s “RPMS” rather than “MPH.” Meanwhile, try to follow his movement with your hips by feeling the swing in his back. And make sure your horse is honestly on the bit, not leaning on your hands. If you’re pleased with the way he’s
going, pick a letter far enough ahead for you to prepare to make a nice halt. For instance, if you’re at A, tracking left, plan to make your halt at B or C.
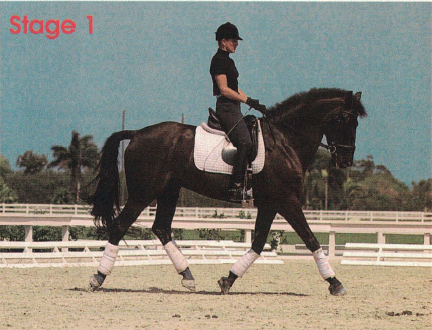
energy in her horse with her legs and contains
it with her reins. She feels the swing of his
back with her hips. Next, she’ll pick a letter
and prepare to make a nice halt at it.
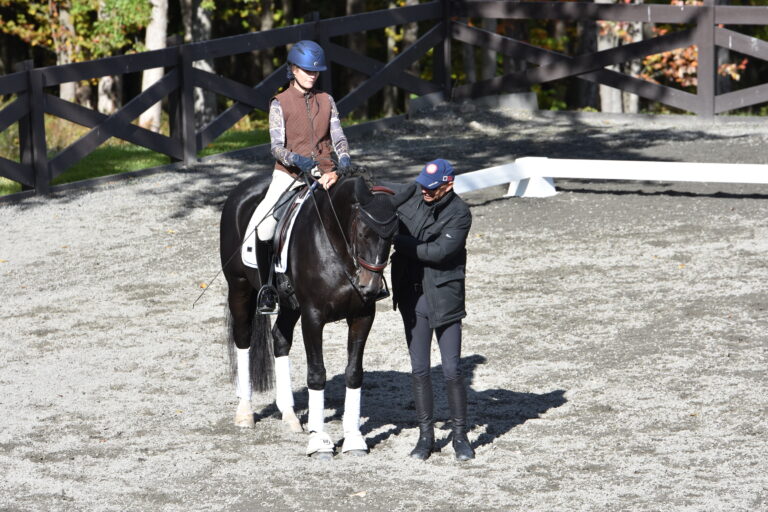
2. Use half halts in your transition to halt. Half halts not only tell your horse something’s coming, they improve his balance and engagement. For this particular movement, use a slightly different half halt than you would for some other movements. Rather than trying to maintain or increase your horse’s stride length, prepare him to shorten it. Close your leg as if you’re asking him to move forward and, simultaneously, turn your wrists slightly inward so that your knuckles point toward each other. As soon as you feel your horse compress slightly, relax your aids. The amount of compression you feel will depend on your horse’s level of training. The more advanced he is, the more he can compress. It also depends on his temperament. If he tends to be willful and quick, begin shortening his stride earlier. If he’s very lazy, be careful not to shorten so much that he loses his forward momentum.
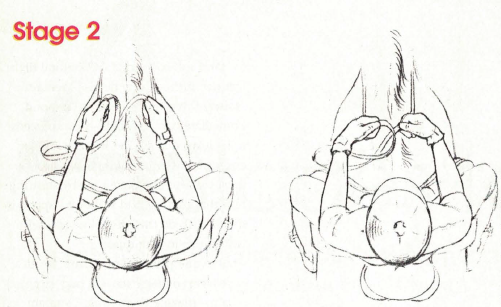
your horse’s stride compresses, relax your aids. Repeat. Approaching your halt mark, sink
deeper into your heels and saddle and stretch with your upper body without leaning back.
Slow the swinging in your hips so that, about two meters from the mark, they are almost still. (Illustration by Sandy Rabinowitz)
Continue half halting, asking him to shorten his stride slightly each time. As you approach the point where you want to halt, sink deeper in your heels and sit deeper in the saddle, stretching up taller with your upper body without leaning back. About 10 meters away from the letter, if you’re on a younger horse, or 5 meters away, if you’re on a more advanced horse, gradually slow the swinging in your hips so that, about two meters away, they are almost still. This takes time to learn. Think of controlling the swing of your hips to gently signal your horse to slow down, without actually stifling the movement of the gait. When schooling at home, particularly on a young horse, use your voice to reinforce your physical aids. The tone of your voice is more important than the actual words. Say “whoa,” or use whatever sound he may have learned on the longe line or around the barn, in a calming voice. Of course, you won’t be able to use your voice in the show ring but, by the time you get to a show, your horse should be educated enough to respond to your physical aids alone.
3. Ask for a full halt. Now turn your wrists slightly inward again, make your fists a little firmer around the reins and rest your legs passively on your horse’s sides, “feeling the hair on his sides” rather than actually squeezing. Think of bringing your hips forward toward your hands. If your horse doesn’t respond, don’t saw or pull unjustly on his mouth. As with any transition, applying the rein aids is a matter of using consistent repetition until the horse becomes sensitive to them. If the aids are used too excessively, he’ll become dull to them. Be careful not to squeeze your buttock muscles, which will cause you to squeeze your legs as well and thus unconsciously give too much of a forward aid.
Ideally, your horse should halt directly from the trot without taking any walk steps. In the early stages of training, however, he won’t have the strength and balance required to do this. You will make him more comfortable about the transition if you allow him to take two to three (or even three to four, if necessary) walk steps. This actually will be helpful in his future work. As his training advances, you will be able to ask him to take fewer and fewer walk steps until he finally makes the transition from trot to halt without walking—and without losing his confidence. To make the transition smoothly, continue to think “walk,” but close your hands instead for the actual halt. This will encourage your horse to stay more balanced as he produces a seamless, but not abrupt, transition.
The moment he halts, relax your shoulders and soften your rein aids. This release is just as important as your initial halt aids. It tells him that you want nothing more at this moment. Don’t relax too much, though—continue to sit tall in the saddle, maintaining a light contact with your reins and legs. Try to mentally communicate to your horse that you want him to remain attentive and ready to respond to your next signal. Meanwhile, sit quietly, without fidgeting or tensing up. Finding this happy medium can take up to a year for a green horse or rider, so don’t despair if you can’t achieve it right away.
Praise your horse with your voice, a pat or a treat within the first second or two of his transition to halt. Reward him for what you want him to remember. If you wait to reward him while walking away, he’ll associate the transition out of the halt with your praise. When practicing the halt, try to stay in it for the minimum length of time it would take you to put both reins in one hand, drop the other hand by your side, salute or remove your hat and take your reins back—about 10 to 15 seconds. If your horse can’t stand still this long, review the pointers in the sidebar, “Establishing a Safe Place.”
on her horse’s sides. The moment he halts, she will relax her shoulders and soften her rein aids.
4. Transition from halt to walk, trot or canter. If all has gone well in your preparation for the halt and in the halt itself, this transition should go smoothly. This means that your horse is still attentive during the halt and responds to your driving aids immediately. His stage of training dictates with how much impulsion he’ll go into the walk, trot or canter.
Not every halt you make will be perfect. But if you focus on making your aids consistent and preparing carefully for each halt, your horse will continue trying to do the best that he can do.
which her horse was attentive and listening, her transition to walk goes smoothly.

Originally from Northern Germany, Volker Brommann is licensed as a Bereiter and a Reitlehrer. He apprenticed with Walter Christensen in Tasdorf, Germany, before moving to the United States. In 1994, he began working with German Dressage Team coach Klaus Balkenhol. Now a U.S. citizen, Brommann trains, competes and coaches other riders at the FEI levels. Based in central California, he runs a training, teaching and sales business, Tannenluck Dressage (www.tannenluck.com), with his wife, Teri Lacey-Brommann.
This article first appeared in the October 2001 issue of Dressage Today.