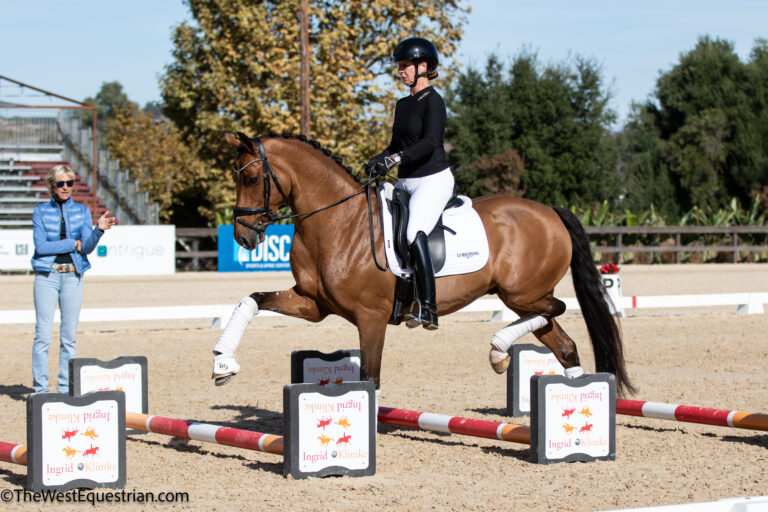
When it comes to teaching horses the piaffe, many roads lead to Rome. Most trainers start with “half-steps,” which ask for the collection and suspension of the piaffe but allow the horse to continue moving forward. In a way, this “traveling piaffe” is similar to a passage, but with more collection. (For the official definitions of piaffe and passage, see the sidebar at the bottom of the article.) Producing this movement on a horse who doesn’t understand the concept can be challenging and stressful. That’s why I was so excited to learn Danish Olympian Morten Thomsen’s extremely effective approach to teaching it.
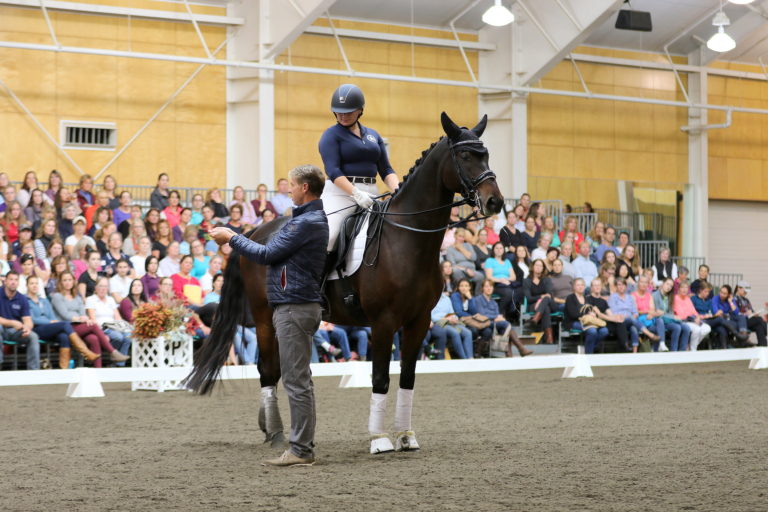
Thomsen breaks the lesson down into very simple, clear steps, which horses find easy to understand. His process is progressive and logical, like teaching mathematics to a child. You have to introduce addition and subtraction before multiplication, trigonometry and calculus. He teaches these steps entirely from the ground, in-hand—holding the horse’s reins and standing next to him—rather than from the saddle. Removing the rider from the equation often reduces the horse’s stress. I also like to see the total picture from the ground: the horse’s facial expression, how he is carrying his back, and how he is carrying his hind legs and front legs.
Not all horses have the talent to progress to Grand Prix, but any horse can learn half-steps with this method. I like to teach it to 4- and 5-year-olds once they can walk, trot and canter on the longe line and under saddle. That way the concept isn’t a big surprise later in their careers. Even at this young, undeveloped age, some offer glimpses of the piaffe, though I never ask for it at that stage. A more immediate benefit is their early grasp of the concept of engagement, which pays off, for example, when they begin collected trot work.
Any person can learn to teach this method so long as you’re patient and willing to put in many hours of practice. Learning how to position your body and apply the cues correctly takes lots of repetition. It also requires excellent timing, which you can develop if you pay close attention to your horse’s reactions and don’t try to rush the process. Don’t be afraid to make mistakes! Even if your horse finds your cues occasionally confusing, he will learn the correct responses as your technique improves. Remember, just like our horses, we all learn best one step at a time.
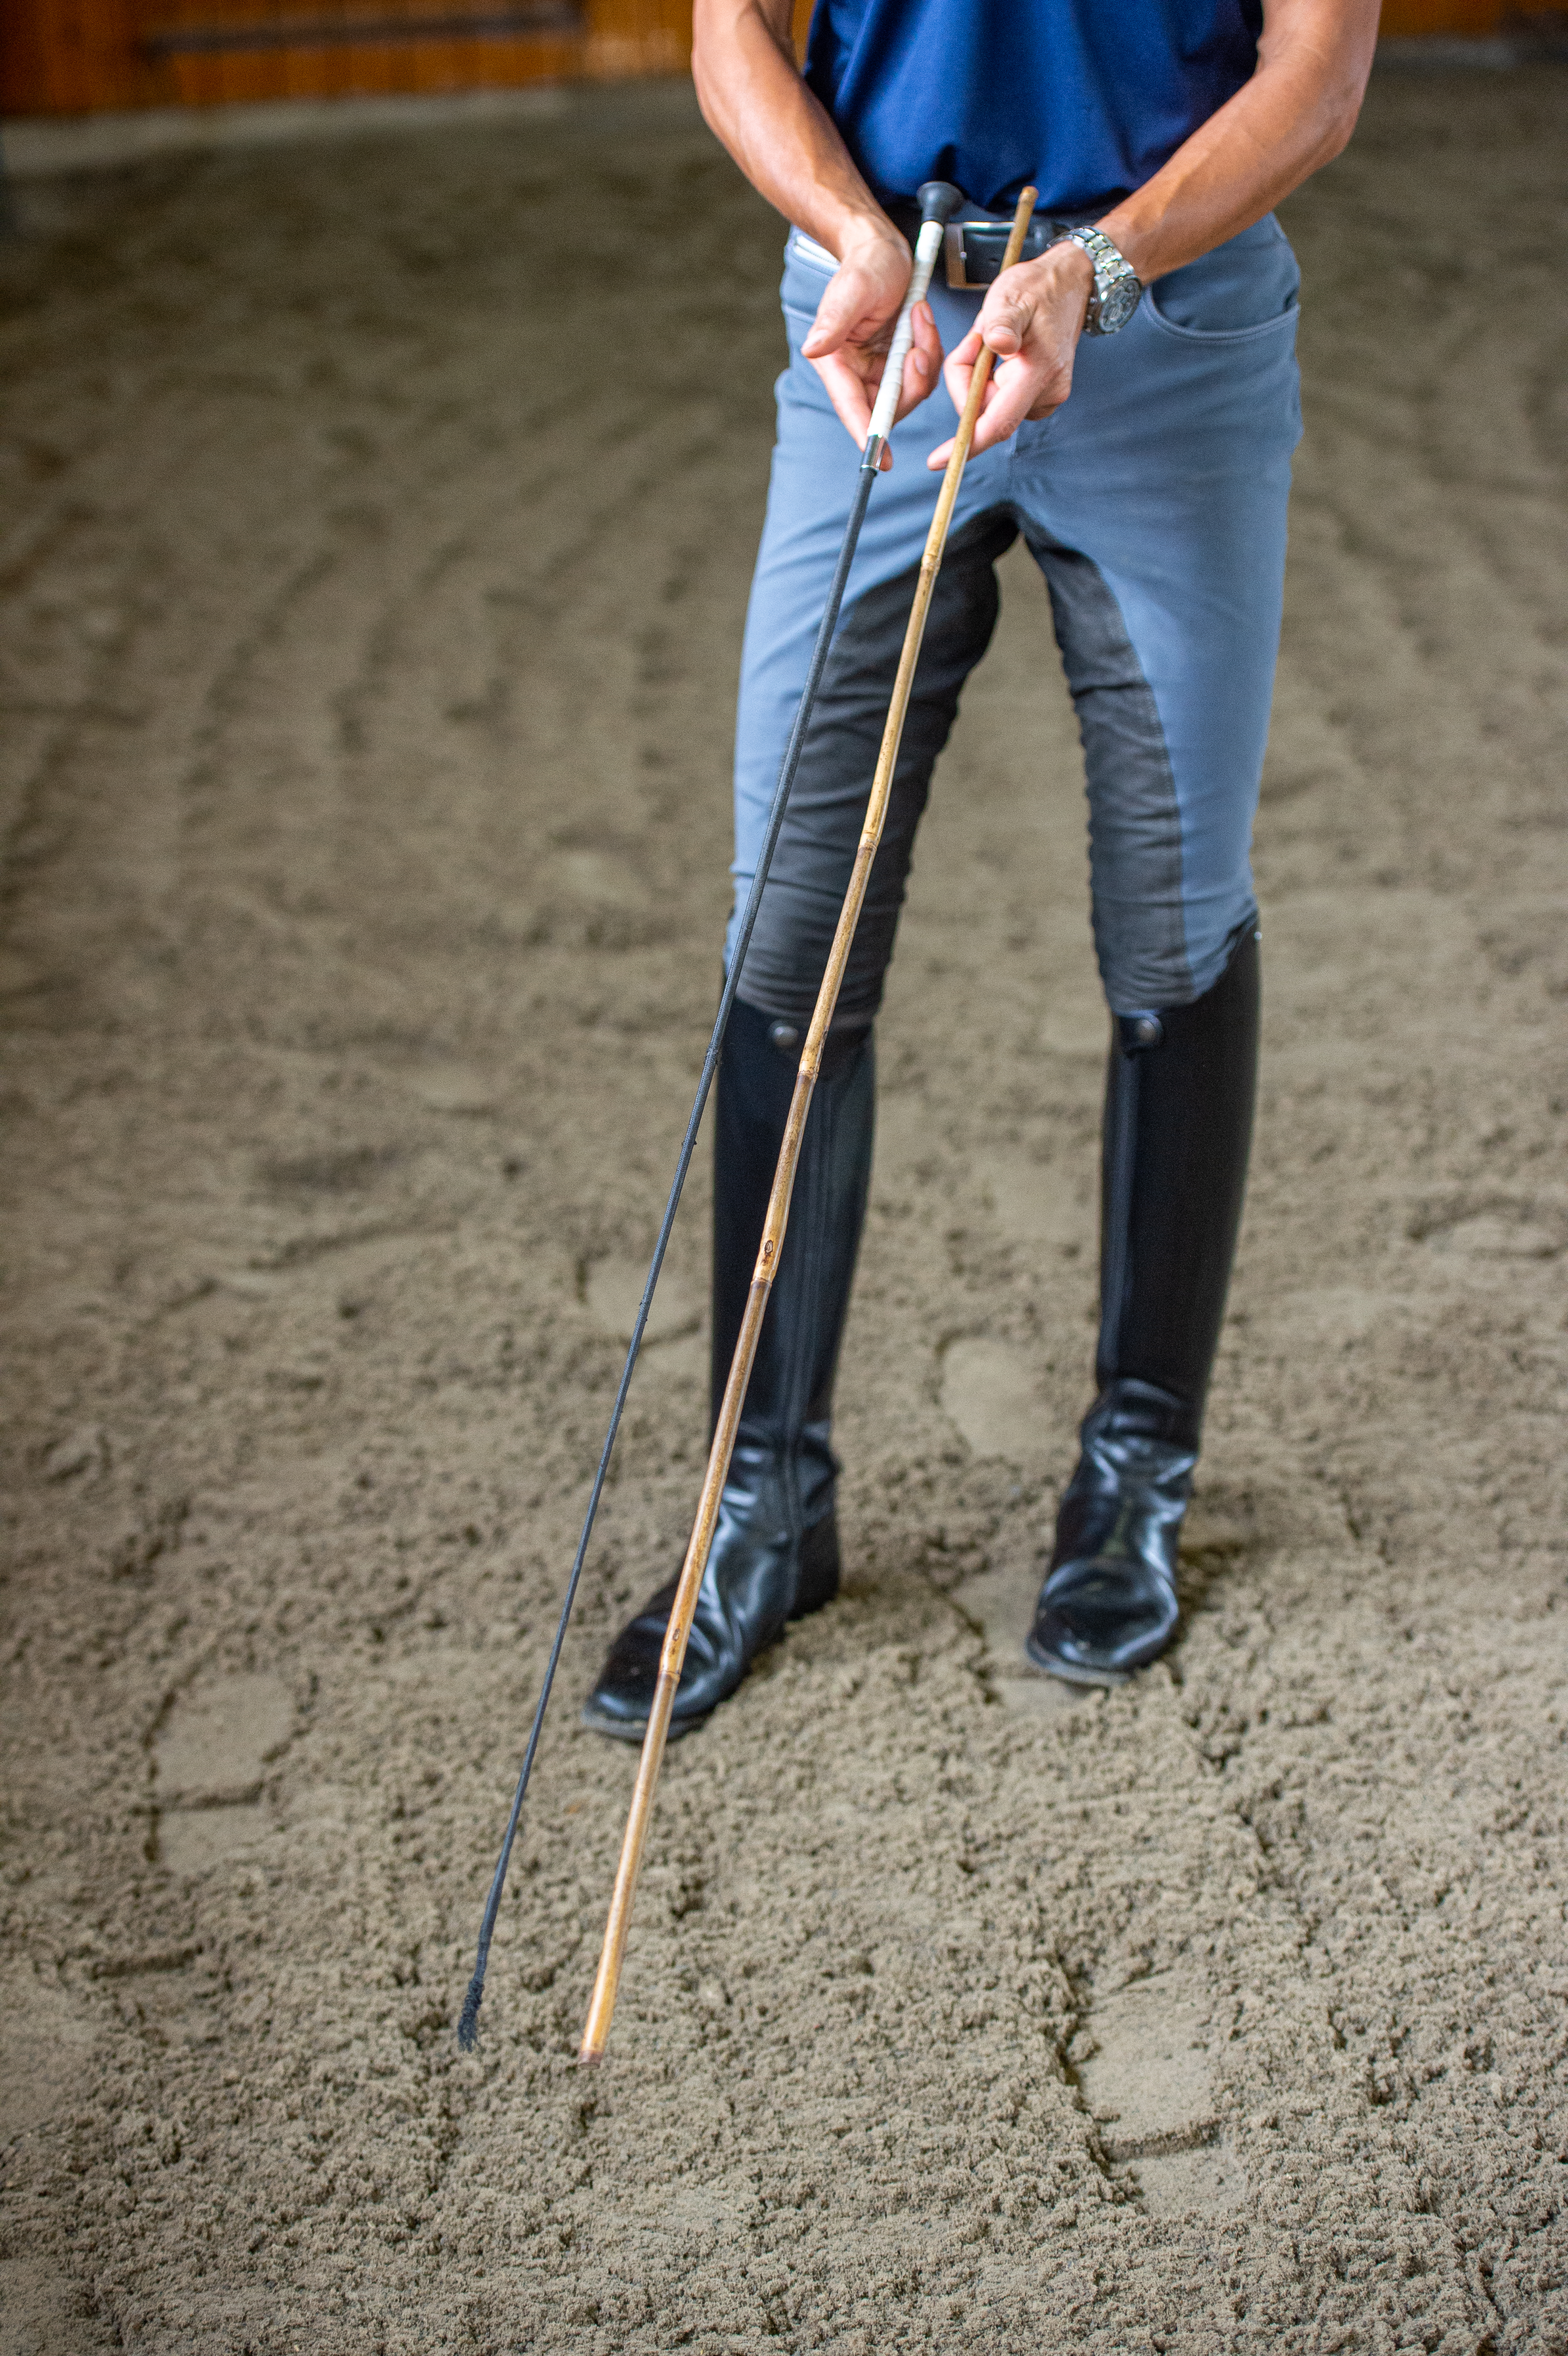
One of the many benefits of this method is that it requires very little extra equipment. For each session, your horse needs only his regular bridle. Instead of a whip, which is too flimsy and unwieldy for these purposes, I recommend buying a lightweight bamboo stick from your local home or garden supply store. Trim it to about 4 feet long—or whatever length allows you to stand by your horse’s shoulder and easily tap the lower part of his back leg. This will enable you to apply cues precisely and get out of the way quickly if your horse kicks out (more on that later).
I recommend teaching these lessons without any boots or bandages on your horse. That way he can easily feel the stick when you tap it on his legs. If your horse has a tendency to swish his tail frequently, you might also consider tying it up in a mud knot so you don’t have to worry about getting the stick stuck in it.
Keep all of your in-hand sessions short—about five minutes each—so there’s no risk of overwhelming or frustrating your horse. I like to do them as a warm-up before mounting for a daily riding session. Some horses grasp the concept in as few as one or two sessions. Others take a bit longer. It’s important to proceed at your horse’s own pace and modify the lessons as necessary to address his needs. Horses are always searching for the right answer. The more quickly you reward even the smallest attempt at that right answer, the more quickly your horse will understand the lesson. And the more black and white you make his options, the faster he’ll learn.
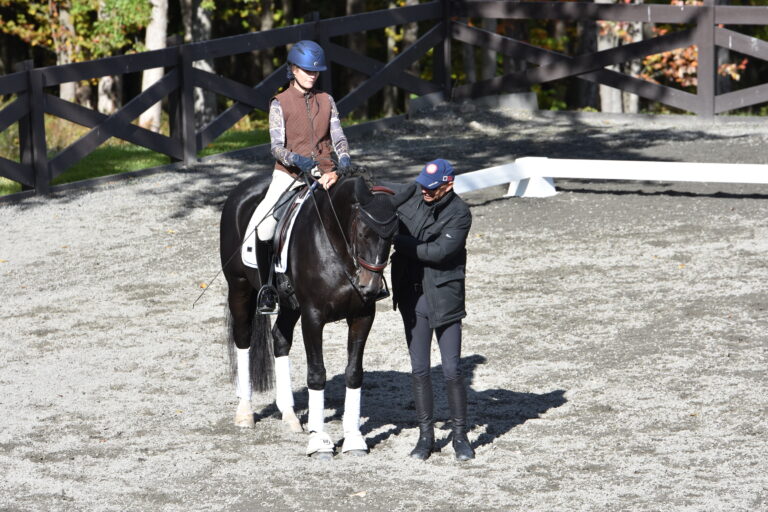
In-Hand Basics
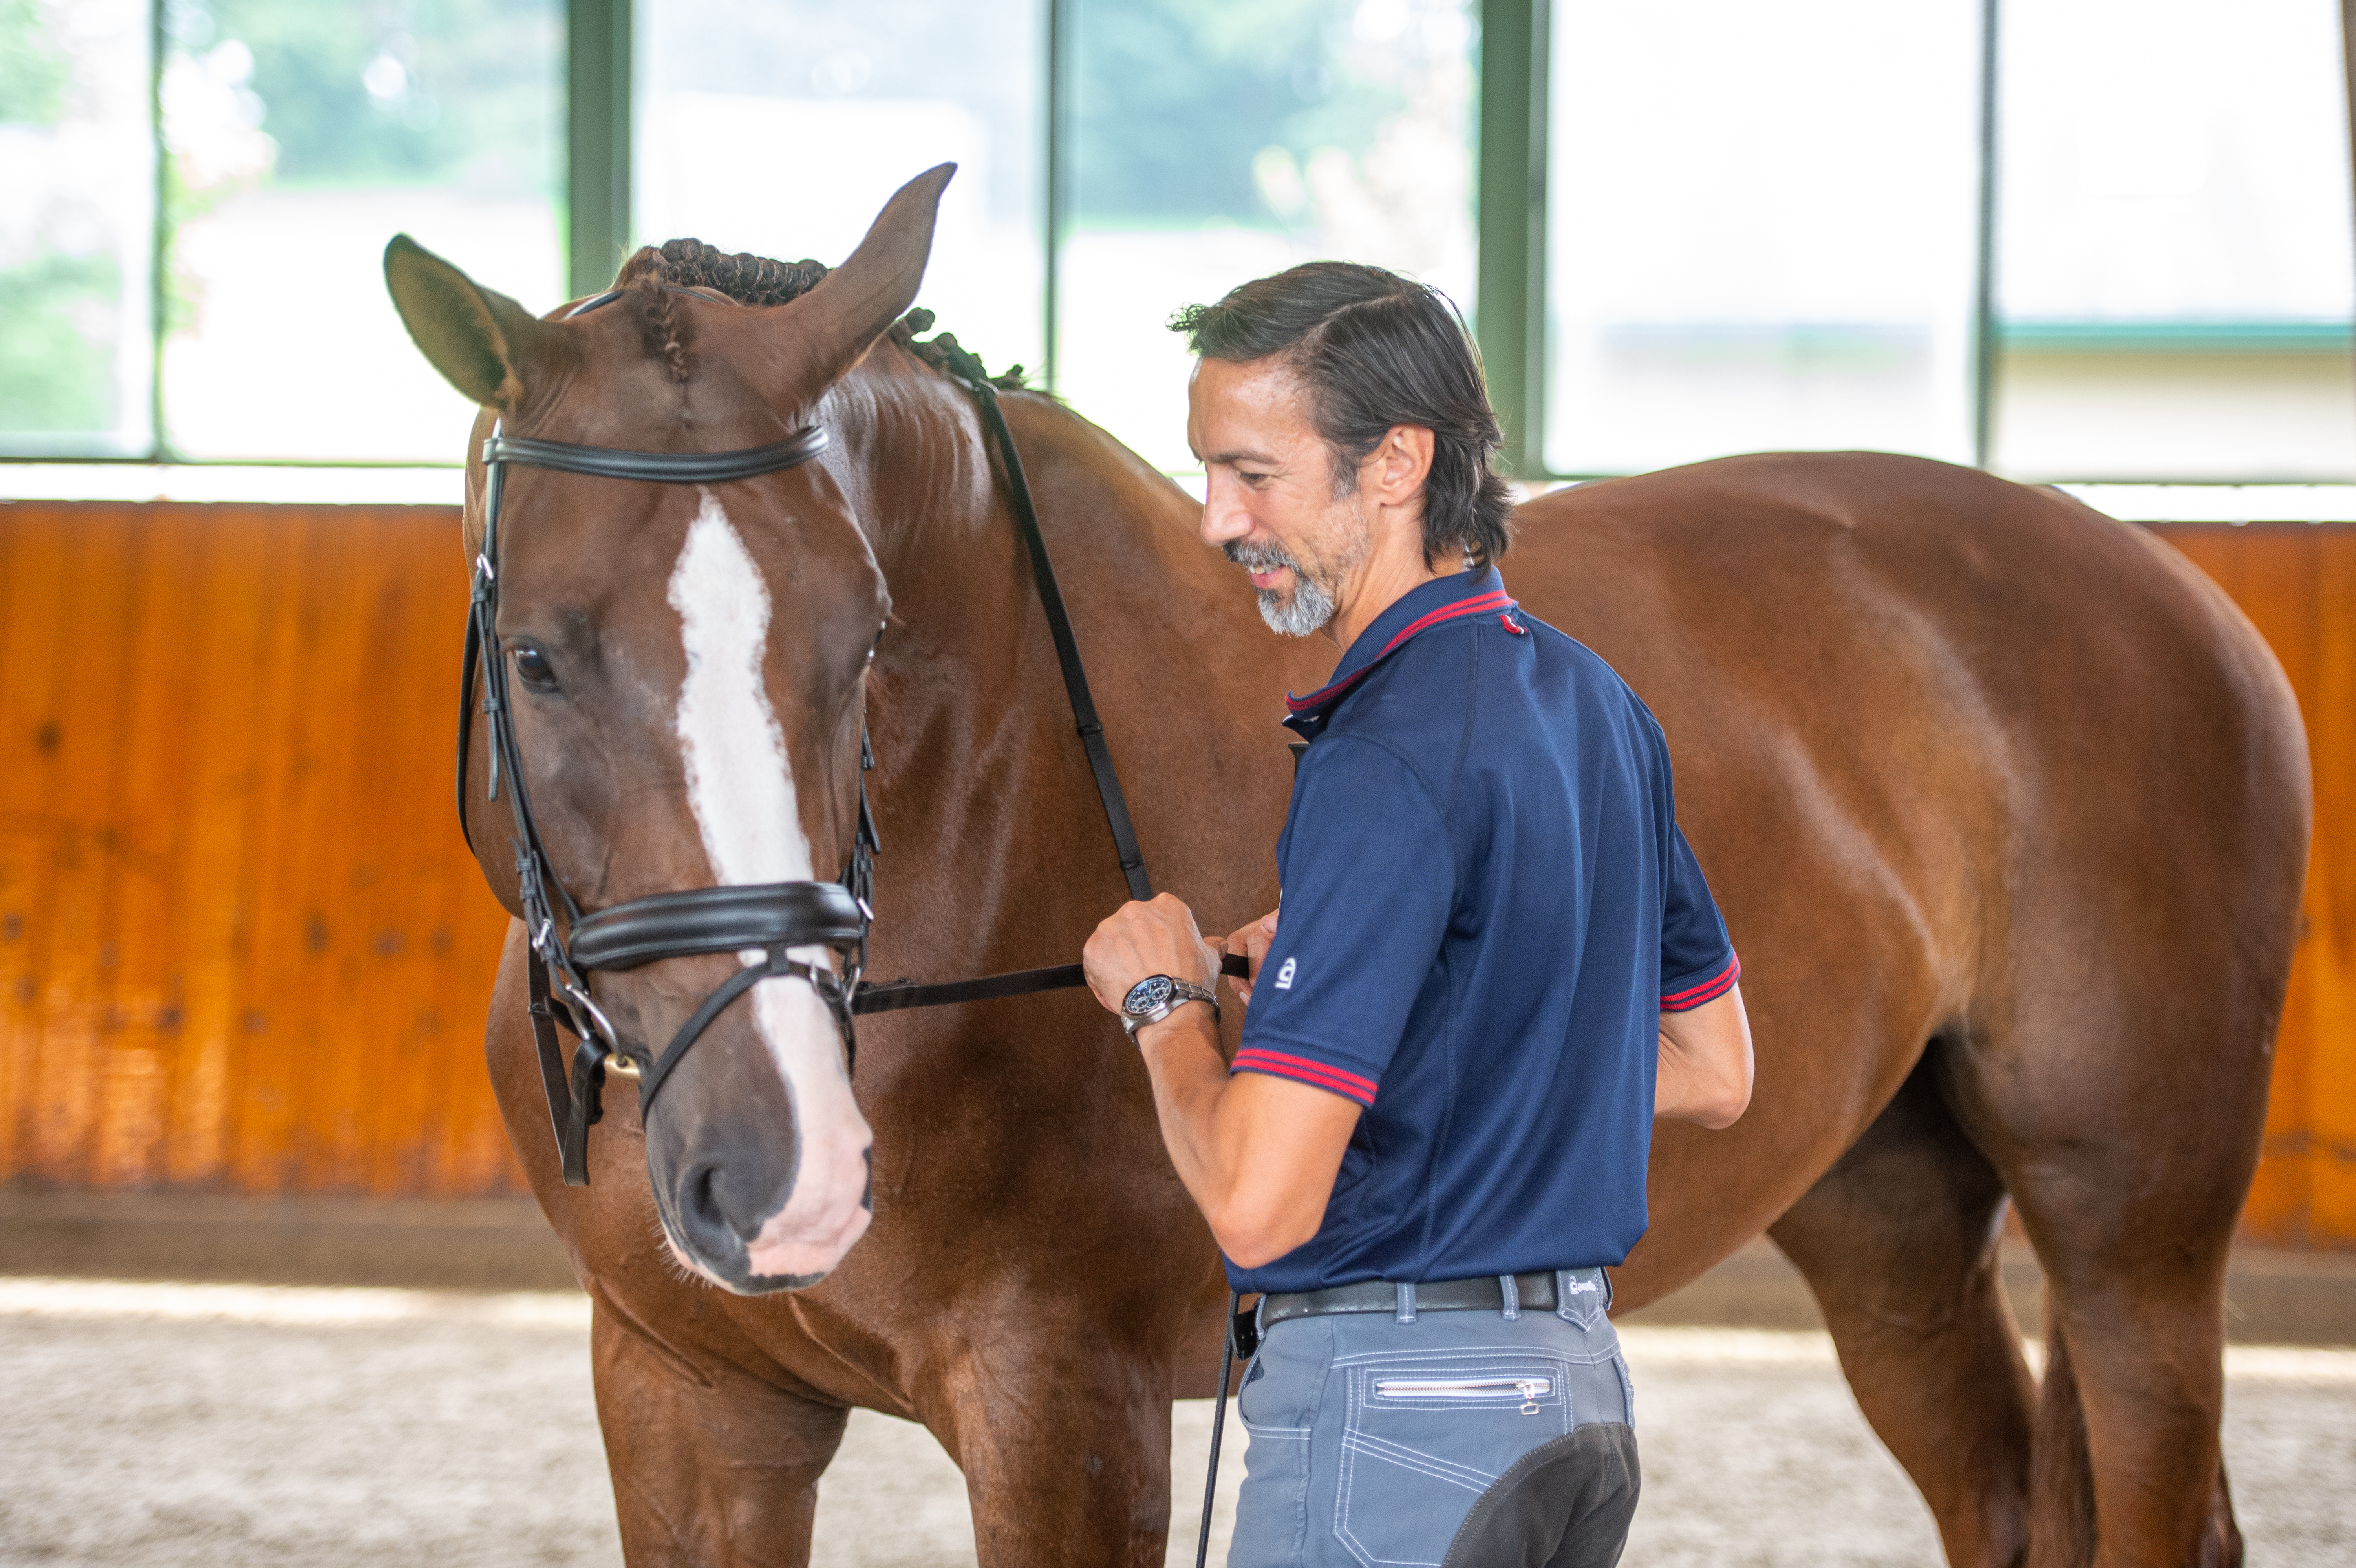
Before beginning the half-step lessons, be sure you and your horse are familiar with some basic in-hand techniques. This will help to build a good rapport between you on the ground while also establishing healthy boundaries, which can be especially valuable with horses with poor ground manners. It will also give you a chance to practice your body positioning.
There are many skills you can teach your horse to do in-hand, from leg-yield and shoulder-in to haunches-in and even half-pass. But all you’ll need to get started on this half-step method are the following simple exercises, which will test his responses to contact and body language. Carry a dressage whip for these early lessons. For in-hand exercises, I put the reins over the horse’s head.
Rein Yield
Start by leading your horse into the center of the arena and bring him to a halt. Once he is standing quietly, turn to face him and take a few steps sideways so that you’re in front of him, but still slightly closer to his left shoulder (not directly facing his face). Then, with your left hand, gently add pressure to the left rein (his left), encouraging him to bring his nose toward you, similarly to the way you’d want him to respond to left bending aids if you were in the saddle. If he doesn’t move his nose at all, try suppling him by applying and releasing the rein pressure repeatedly. Continue doing this until he yields slightly, bringing his nose toward you and thus relieving the rein pressure on his own. Release all of the pressure immediately to reward him. Then repeat the process two or three times to confirm that he understands this concept of yielding to the contact.
Repeat this exercise on the right side. Take a few steps sideways to position yourself closer to his right shoulder, but still slightly in front of him. Then, with your right hand, ask him to yield to the right rein (his right).
In both directions, be sure that he is softening to the contact on his own, rather than just letting you pull his nose sideways without any lightening of the rein pressure.
Lateral Step
Before introducing the next exercise, I want to stress the importance of standing a safe distance from your horse’s hind legs during every stage of this process. Some horses react to the unfamiliar tap or tickle of the whip by kicking out, just as they might react to something in nature, like a horsefly. A good rule of thumb is to never step farther back than where you’d be sitting if you were in the saddle. Also be sure you have absolute control over your horse’s head and neck at all times. Keep the rein contact short enough so that he can never spin away from you and kick out in your direction.
Still in the center of the arena, stand by your horse’s left shoulder again, facing him. Hold the reins in your left hand and the whip in your right. Just as you did in the rein-yield exercise, add a little pressure on the left rein to bring his nose slightly toward you. Then turn to face his haunches and take a step toward them while making your forward/engage clucking sound at the same time. The goal is for him to lift his left hind leg up and step it across underneath his belly and in front of his right hind. If you don’t get this response, move the whip toward his hind leg in a swinging motion while clucking simultaneously. If necessary, tap him on the hip or rump with the whip. The moment he moves the left leg laterally, immediately remove the pressure—relax the rein contact, step back toward his shoulder and swing the whip behind your body—and praise him.
Think of this exercise as sort of a moving turn on the forehand, in which your horse’s body acts like a pendulum. When his head moves left, his haunches move right. The goal is to test his response to pressure, so ask for only one or two steps at a time. When you’re happy with his response, repeat the exercise in the other direction, standing on his right side, turning his nose to the right and asking him to step his right hind leg to the left.
Walking and Halting on the Rail
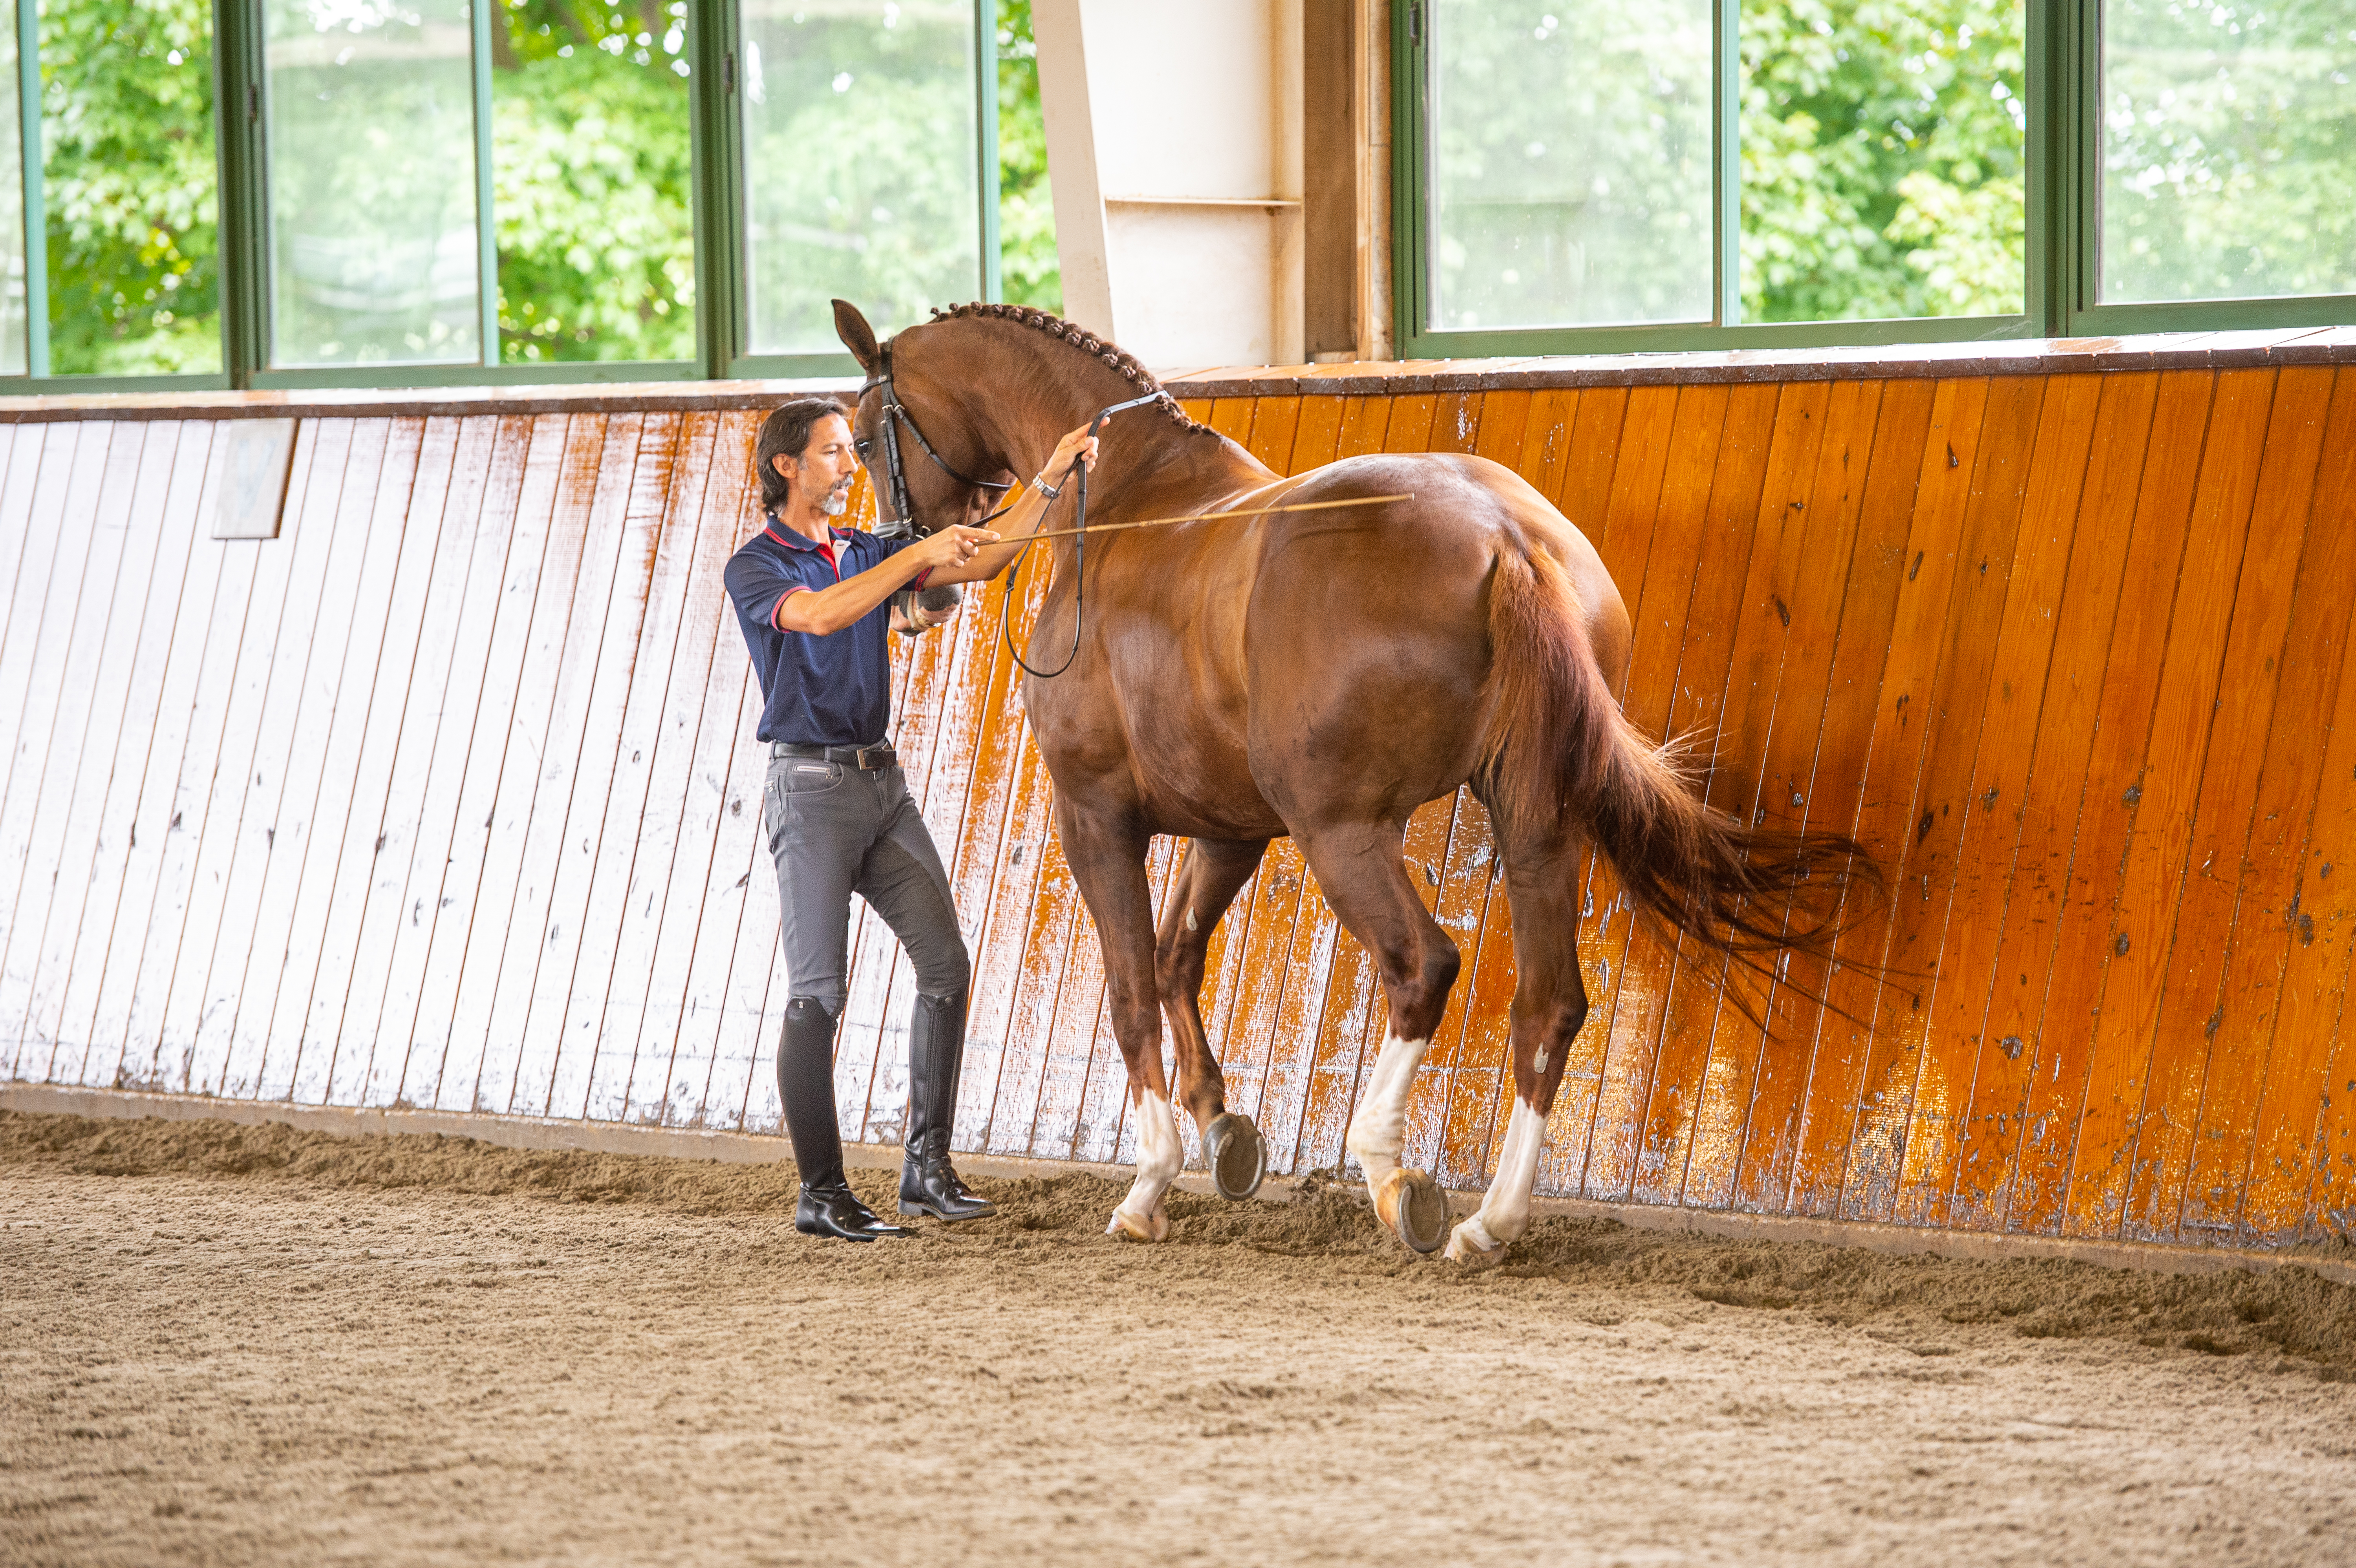
Next, lead your horse to the rail and track left. (I always start in-hand half-step lessons tracking left and practice them almost entirely to the left—not switching to tracking right until the horse is confidently performing actual half-steps. Because we normally lead horses on the left, this allows us to teach them from a familiar position while using the wall or fence on the other side to help keep their bodies straight.) Position your body even with his shoulders, facing forward. With the reins over his head, check that the buckle is on your side of his body, and the right rein is resting on the withers. Hold both the right rein and the whip in your right hand, with your knuckles pointing down so the whip is pointing toward your horse’s tail. Hold the left rein in your left hand.
Walk forward and halt a few times to get a feel for the contact and to be sure your horse is responding correctly to the forward and halting aids. Then practice walking backward while he walks forward. As you turn around, grasp the right rein in your left hand—so that hand is now holding both reins—then let go of the right rein with the right hand. Continue carrying the whip in your right hand. After a few moments, turn around and walk forward again, picking up the right rein in your right hand again.
Continue doing this until you can make the changes smoothly without altering the pace or losing your body position between your horse’s poll and the point of his shoulder. (When you begin learning this skill, I recommend removing your spurs, just to be sure you don’t trip on them.)
When you’ve gotten the hang of this, practice halting for a few moments and then ask your horse to walk forward (while you walk backward), still staying by his shoulder. Keep the reins short enough so that you can maintain a steady, supple contact with both sides of the bit, just as if you were riding. Tap the whip on his haunches as necessary to encourage him forward, reinforcing the tap with a cluck. Repeat these halts several times until your horse is performing them promptly and obediently.
Moment of Pause
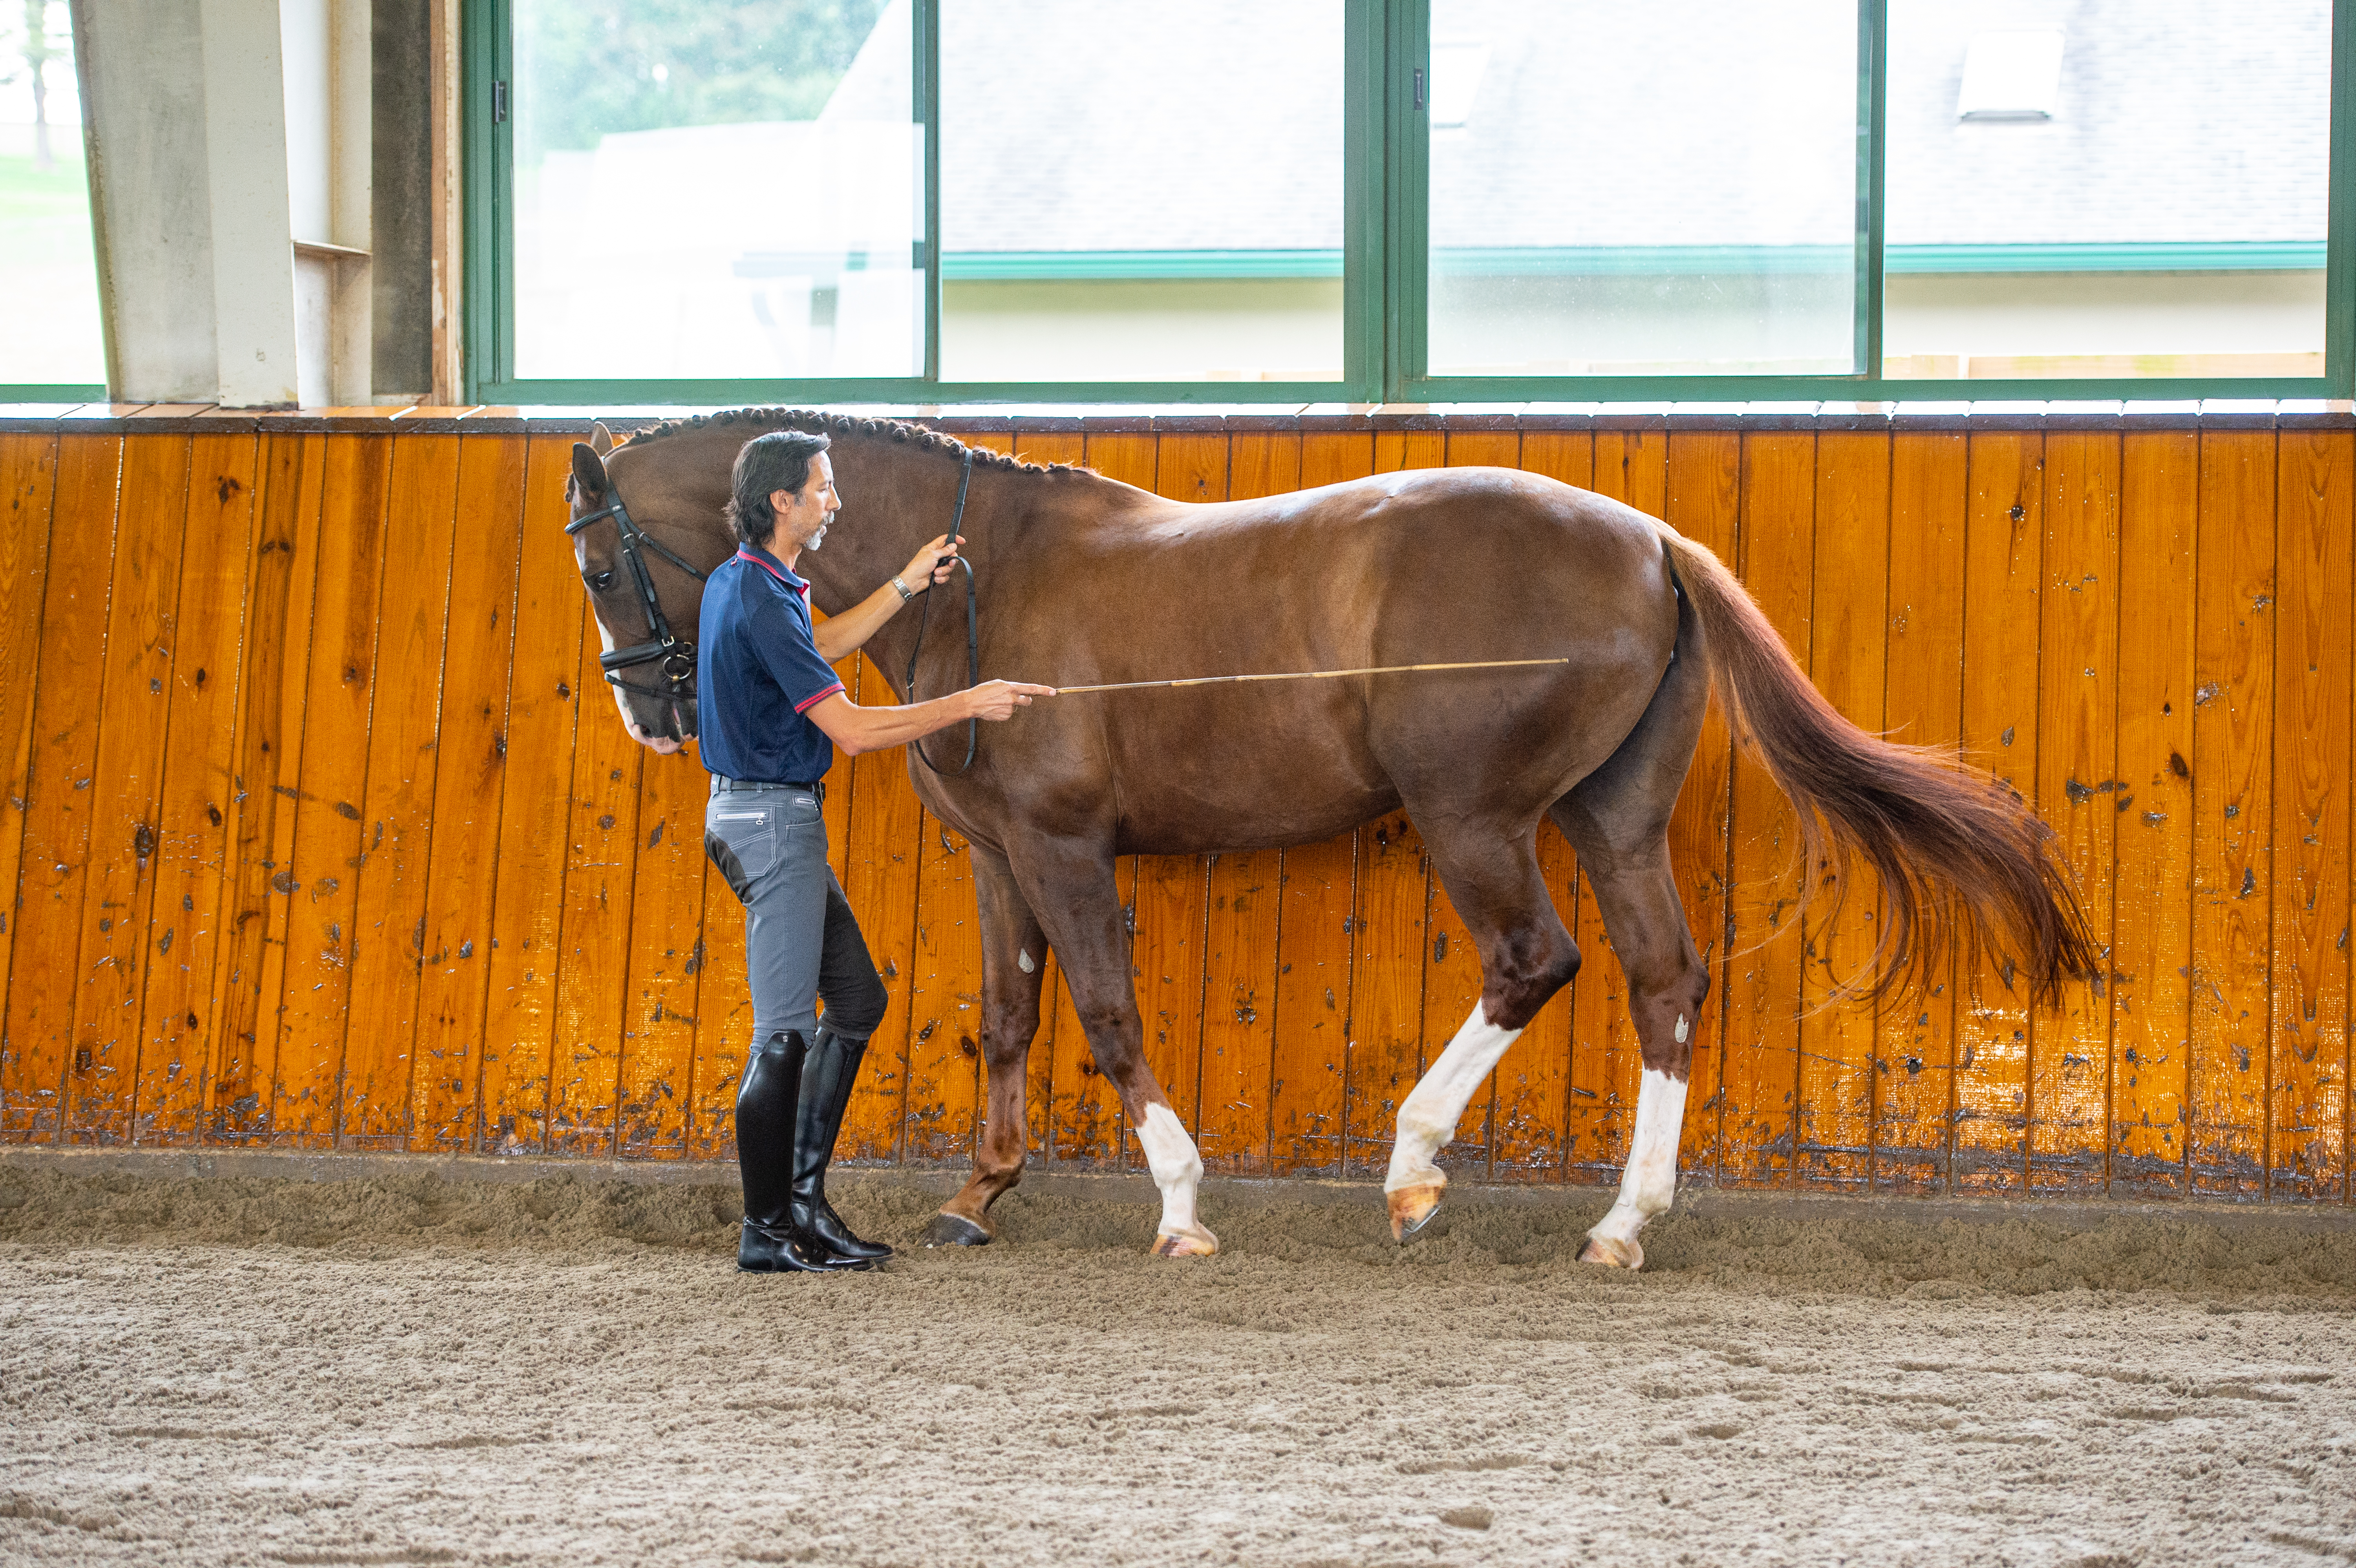
Once your horse can perform the above exercises easily and willingly, you’re ready to teach him to pick up a single hind leg and hold it in the air for a brief moment. To do this, you’ll need the bamboo stick. Warm up with the rein-yield and lateral-step exercises in the center of the ring, then lead him to the rail, tracking left. Put the reins over his head and rest the right rein on the withers, just as you did with the earlier leading lessons. Then ask him to halt in an “open stance”— with his left hind leg positioned farther back than his right hind leg. (If he doesn’t halt in this position, simply ask him to step forward until the left hind leg is where you want it.) This will naturally set him up to pick up his left hind leg when you cue for it.
Standing facing him, next to his left shoulder with both reins in your left hand and the stick in your right, gently stroke him on the croup with the stick to accustom him to its feel and gauge his reaction. If he responds by stepping forward, gently move him back into the open-stance position. If he startles, kicks out or reacts in any other negative way, continue stroking him with the stick until he relaxes, then remove the pressure of the stick. Do not punish him for this natural reaction.
Once you’ve gauged his sensitivity to the stick, tap it lightly on the back of his lower left hind leg, somewhere between his hock and fetlock, clucking at the same time until he lifts the leg up. (If he’s extremely sensitive, work your way down his leg from the croup, touching his body with the stick continuously, so the contact with his lower leg isn’t a surprise.) Continue tapping on the leg for a split second after he picks the foot up, encouraging him to hold it in the air for just a moment (no more than a second). Then release the pressure by quickly pulling the stick away, stepping away from his haunches slightly and praising him. Don’t worry about where he puts the foot down.
This is where timing is critical. If you remove the pressure of the stick as your horse is putting the foot back down, he might misinterpret this to mean that you’re rewarding him for the downward motion, rather than the upward motion. In his mind, he thinks, “The faster I put my foot down, the faster she removes the pressure.” As a result, he might start lifting his foot in response to the stick but then stomping it right back down. We want the opposite: a brief pause while his foot is still off the ground. He should think, “The pressure goes away when I pick up my foot higher than normal and hold it there for a moment.”
Getting just the right stick tap is tricky, too, as it varies from horse to horse. For most horses, the tap can be quite light. As a rule, do as little as possible, but as much as needed. Exactly where on the lower leg the tap is most effective varies from horse to horse as well. Sometimes it helps to initiate the cue with a slow tapping, then speed up the tempo as your horse takes the foot off the ground to encourage him to lift it higher before putting it back down. This helps to emphasize the engagement moment. Give yourself time to figure it out. The only way to develop the right tap and timing is through practice.
After your horse picks up the foot successfully once, walk him forward a few steps (still facing backward yourself) on a loose rein, holding just the left rein with your left hand, while checking that his expression is still relaxed and comfortable. As you continue to walk backward, watch the movement of his hind legs and try to time your rein and voice cues for the next halt so that he stops in the desired open stance for you to repeat the exercise. It might take several repetitions to get this timing right.
As you practice this exercise, observe closely how he moves the hind leg. It should come up and forward, engaging (flexing all the joints of the leg) just as in any movement of collection. If he lifts it up and backward in more of a kicking motion, that won’t build the understanding you need for future steps. To fix that problem, try using a lighter tapping aid. If that doesn’t work, as you tap the hind leg, move your body toward his head as if cueing him to begin walking. This will encourage him to swing his leg forward, rather than backward. (Normally, you don’t want to encourage so much forward movement—the goal is for the leg to swing more upward—but it’s important to fix this problem quickly before it becomes a habit.) Getting this timing right can be extremely challenging, so ask a professional for help if you’re having trouble. Most importantly, don’t reprimand your horse for giving the wrong answer (or, in this case, half of the right answer—the up but not the forward). As with any lesson you teach him, stay calm and try different ways to ask the question until he gives you the right answer, then release the pressure and praise him effusively. When he offers a particularly good response, give him an extra reward by taking a short break to walk to the opposite long side of the arena or make a large circle on a loose rein. He’ll quickly associate the right answer with these positive outcomes and begin to offer it every time.
For your first session, continue the exercise for a total of no more than about half a circuit around the arena, then end the session. Do it again before your next ride, still tracking left and focusing on the left hind leg.
When he really seems to understand the exercise and is responding consistently to your cue—which might take a number of sessions—add the right hind leg to the process. Start in the same way: tracking left along the rail and halting him in an open stance. Ask him to pick up the left hind leg. If he does that successfully and puts the left hind foot down in front of the right hind—in the opposite stance to the one you’ve asked for previously—without moving him forward, reach the stick under his belly and tap him on the front of the right hind leg. (If he places the left foot down next to or behind the right foot, rests the left hind foot or seems to be in too awkward a balance to cue the right hind pick-up, walk him a half-step forward to put him in a better position.) Continue tapping until he lifts up the right hind and holds it in the air for a moment, then remove the pressure of the stick to reward him. Walk a few steps forward and repeat the process, always starting with the more familiar left hind, followed by the right hind.
This way, everything else about the exercise stays the same, so it’s not a big transition for you or your horse. You’ll find that he transfers his new understanding of the exercise very quickly from the left leg to the right.
Every Four Steps
In the beginning, some horses have trouble balancing on three legs while pausing a hind leg in the air. Don’t worry if your horse wobbles around a bit during that brief moment. When he starts to get the hang of it, introduce the idea of producing that moment of pause while in motion. Begin by tracking left on the rail and focusing on the left hind leg, just as you did in the above exercise. Walk him forward four steps (while you walk backward), then halt him in the open stance, with the left hind leg behind the right. Cue him to pick up the left hind leg and pause it in the air. Then immediately ask him to walk forward again, while counting the steps of the hind legs. Count “one” when he initially picks up and pauses the left hind leg, “two” when he steps forward with the right hind leg, “three” when the left hind leg steps forward, and “four” when the right hind leg steps forward again. Then halt him, leaving the left hind out again, and repeat.
When this is easy, skip the halt: Ask him to pick up the left hind leg, count forward four steps, then ask him to pick it up again, count forward four steps, and so on. Each time you get to the fourth step—in the moment when you were previously halting—squeeze and release your hand on the reins to ask for a half-halt just before he picks up the left hind leg. Then cluck to encourage him to engage (lift and pause) that leg. Repeat this for about half a circuit around the arena.
Some horses quickly pick up the rhythm of this exercise and automatically engage the foot every four steps in reaction to just the cluck, so there’s no need to touch them with the stick. Practice with the left hind leg for several sessions, then move on to the next exercise. There is no need to practice this exercise with the right hind.
Half a Half-Step
Once your horse is successfully “picking up a foot” every four steps, transition to asking him to do it every other step. Still focusing on influencing only the left hind leg, ask him to “pick it up” each time he steps it forward. So count “one” each time you tap the left hind leg and cluck, then “two” when he steps the right hind forward, then back to “one” as you cue him to pick up and pause the left again.
When learning this exercise, some horses swing the left hind leg up so high that they transfer extra weight onto the right hind leg, producing a sort of hopping motion. This is totally normal. Praise your horse for trying so hard to give you the right answer!
Note that I said, “pick up the foot,” not “feet.” We’re still asking your horse to focus on just one hind leg at a time. At this point, the exercise is essentially half a half-step. Just as with the earlier exercises, practice this with the left hind leg, tracking left, until your horse is responding correctly and consistently. Continue to start each session by reviewing the earlier lesson at the halt first, asking him to pick up the left hind leg individually, then the right hind leg.
The goal is always to keep your horse extremely relaxed and confident throughout this entire process. If he ever seems confused or starts to get tense, de-escalate the situation by going back to the very beginning: asking him to pick up just his left hind leg at a standstill. Imagine he’s telling you, “I can’t do math anymore!” Your response is to slow down and simplify the lesson for him again: “Yes, you can. Remember that one plus one is two. This is all I really want.” Stick to the easier lesson until he relaxes again.
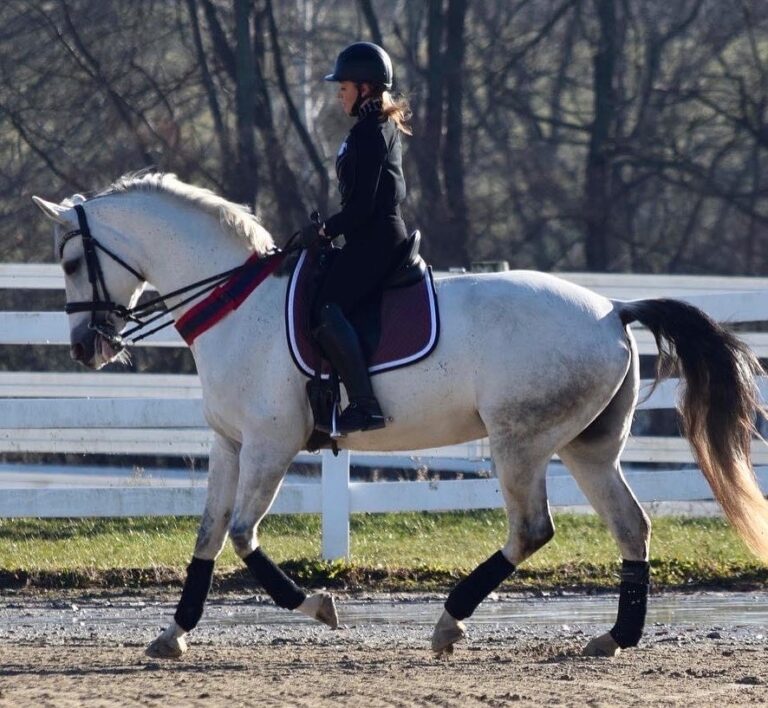
Half-Steps
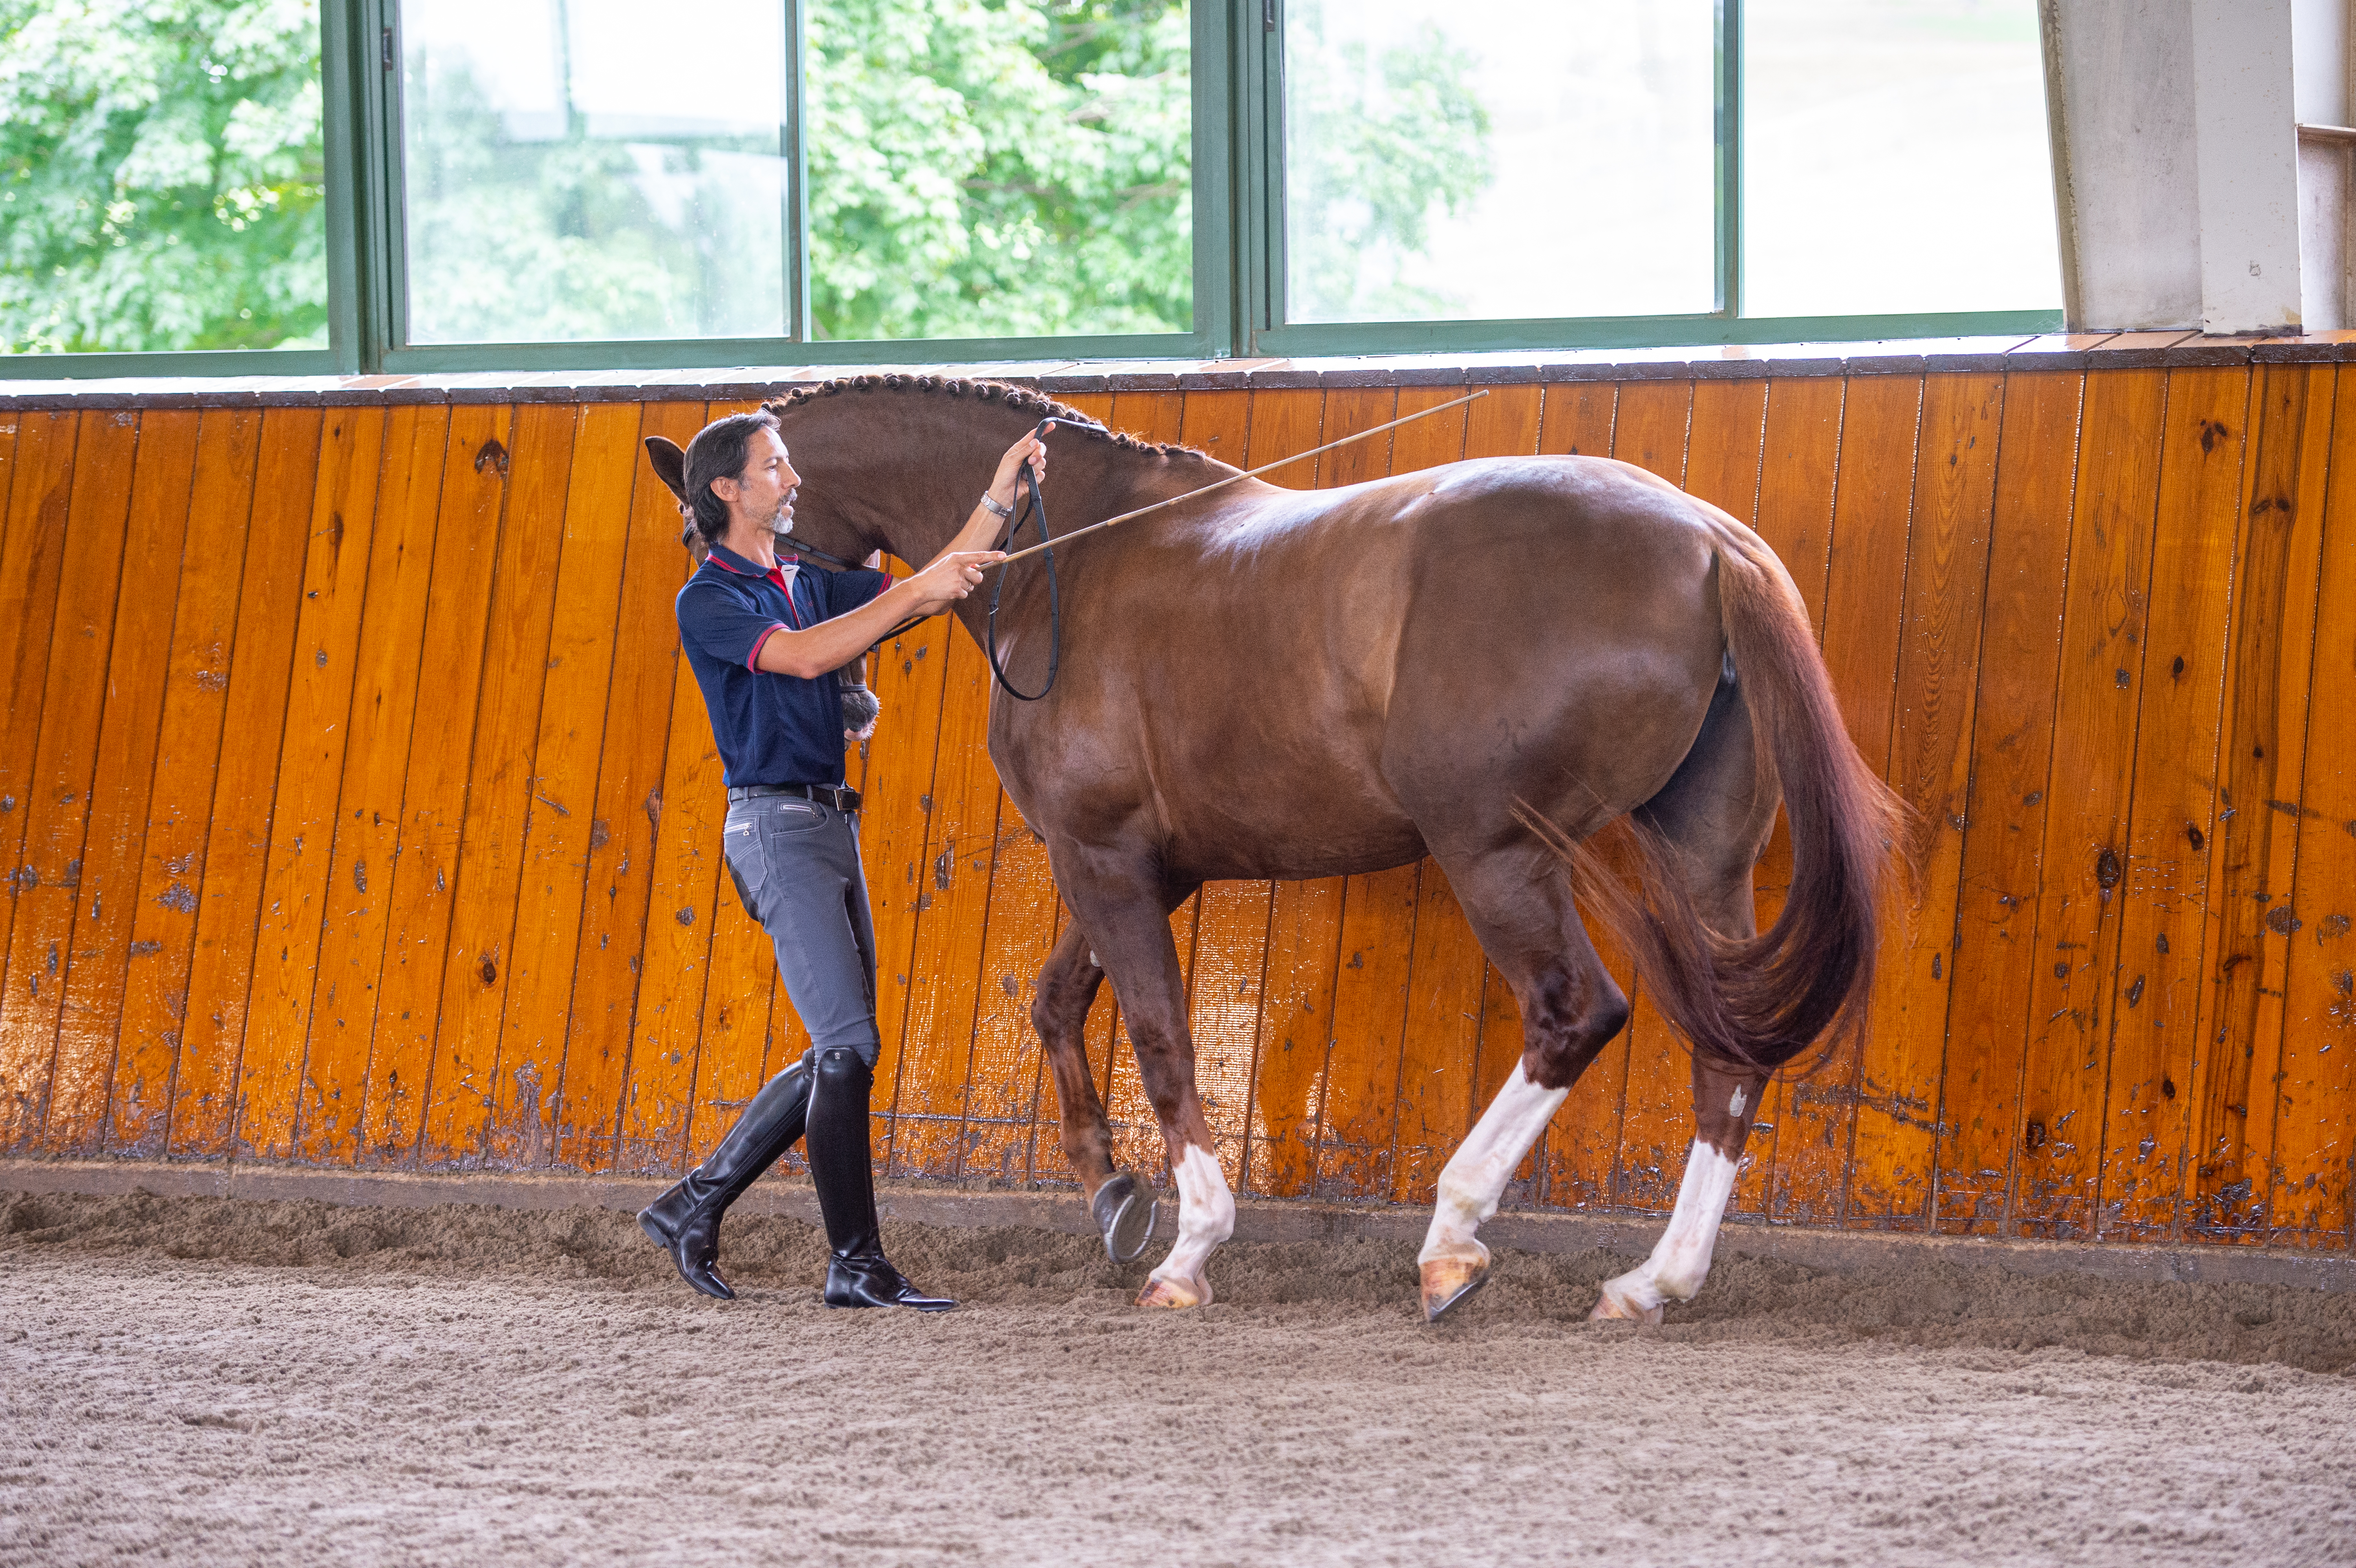
When all of the previous exercises are crystal clear in your horse’s mind, he’s ready to try half-steps—engaging both the right and left hind legs each time he picks them up. By now, you should be much better with your timing. Simply begin the “half a half-step” exercise with the left hind leg. Add a second cluck to cue the right hind leg to engage, as well, just as he lifts it off the ground. At the same moment, tap the stick on the top of the croup. Exactly where you tap depends on the horse. Find the place that produces the best reaction.
Continue clucking in rhythm with each hind leg step. Again, how you use the stick depends on your horse. At this point, you might need to initiate the exercise only with a tap on his left hind leg, then rely on just the cluck in rhythm with his movement to engage that leg with each subsequent step, while tapping on the croup to engage each step of the right leg. Alternatively, your horse might still need a light tap of the stick to continue engaging the left hind, but might volunteer the right hind engagement in response to just a cluck. If you have to continue using the stick to engage both hind legs, it’s fine to tap the left leg above the hock at this point, so you have time to move up to the croup to cue the right. You’ll have to be quicker with the stick—and, as always, it will take practice to get the timing right. If you don’t get the response you want, try a different style of tapping, or tap the stick in a different place.
Meanwhile, maintain a steady, yet supple contact with both reins, allowing your horse enough freedom to continue moving forward while staying connected over his topline from his hindquarters to the bridle, so he can engage the hind legs in this collected movement. Whenever necessary—if he gets too quick or loses the rhythm—squeeze and release your hand on the reins to ask for a half-halt.
At this point, you may find that your horse volunteers half-steps of his own accord, almost reflexively picking the right hind leg up as high—or sometimes even higher—than the left. This is the best proof that you’ve worked through the earlier exercises slowly and consistently—and successfully! If he has maintained the suppleness and relaxation you encouraged throughout the previous exercises, the engagement of the hind legs will transfer to the front legs as well. When he swings each hind leg forward, that energy will travel over his soft topline, cueing the diagonal front leg to engage simultaneously. The initiation of this half-step exercise, therefore, will happen much like an extremely collected walk–trot transition, only instead of transitioning to trot, your horse will engage his legs in diagonal pairs in a moving piaffe: half-steps!
If he continues to move the front legs separately from the hind legs, there is likely tension over his back and topline. Return to an earlier exercise until you’re sure he’s relaxed and supple before trying half-steps again.
When this exercise feels really easy, it’s OK to try it tracking right. This adds a new variable to the equation, however, so go back to the beginning of the process: starting with picking up just the left hind at a standstill, then progressing through the steps the same way you did when tracking left. Keeping the lessons extremely simple—adding only one new variable at a time—is the key to success.
Piaffe and Passage: Official Definitions
The U.S. Equestrian Federation defines passage and piaffe as:
Passage: a measured, very collected, very elevated and very cadenced trot. It is characterized by a pronounced engagement of the quarters, a more accentuated flexion of the knees and hocks and the graceful elasticity of the movement. Each diagonal pair of feet is raised and returned to the ground alternately with cadence and has a prolonged phase of support compared to the phase of suspension.
Piaffe: a highly collected, cadenced, elevated diagonal movement giving the impression of being in place. The horse’s back is supple and elastic. The quarters are slightly lowered, the haunches with active hocks are well engaged giving great freedom, lightness and mobility to the shoulders and forehand. Each diagonal pair of feet is raised and returned to the ground alternately, with an even cadence.
More In-Hand Basics
As your in-hand skills improve, incorporate two invaluable lessons into your program: the rein back and “parking” (standing still) at the mounting block. The latter is one of the most essential basics you can teach any horse. Not only does it guarantee your safety during mounting—always a vulnerable moment—but it also serves as a “reset button” at horse shows. Horses who learn to relax and stand still next to the mounting block at home find the same comfort when you line them up next to it at shows.
To read my article “Teach Your Horse to Rein Back,” click here. To read Nicholas Fyffe’s article “Grounded Expectations” for detailed instructions on how to teach your horse to stand still at the mounting block, click here.
About Michael Bragdell
Originally from Sweden, Michael Bragdell is a U.S. Dressage Federation certified instructor and bronze, silver and gold medalist. He is the training director at Hilltop Farm, in Colora, Maryland, where he has worked since 1995. Riding horses he started under saddle, Michael has won the U.S. Equestrian Federation Four-Year-Old National Championship twice and the USDF Dressage Finals three times. In 2017, he was accepted into the USEF Development Program with Sternlicht and Qredit. Two years later, he and Qredit placed fourth in the Grand Prix and sixth in the Freestyle at Dressage at Devon, the stallion’s first CDI. Successful as both a handler at breed shows and a rider in the dressage ring and sporthorse testings, Michael also presents for the USDF Sport Horse Prospect Development Forums.
This article originally appeared in the Spring 2021 issue.