I just rode with Linda Zang yesterday and it was very informative. It is amazing how you can train students/horses all day and then work your own horse in some funny way that has nothing to do with your own system… so we straightened that out pretty fast!
First, we looked at the saddle fit – which I do with my own students and horses in training – to determine that, even though it was a custom, it had fallen back since the last fitting. A little padding in the rear and suddenly it was easy to keep myself in a correct position. DUH! number one.
ISSUE:
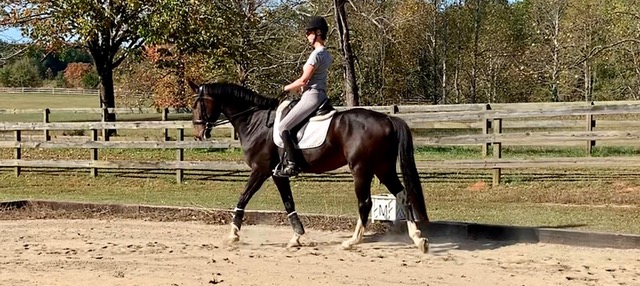
I had asked to work on a better throughness and contact, because my horse tends to get too tight and light in front and has his head in a false frame. Actually, I explained it to Linda as being in “A Biomechanical Funk!” – I just didn’t feel a constant connection between my horse’s hind to front and my body to his.
ANSWER:
From riding my horse without mirrors/coach for a while, I had started to look down to “watch” him. It collapsed my torso and got me hovering over him with my elbows slightly out. As a result, I had given up the catching aids of the outside – the constant support of the outside rein and stability of my core.
SOLUTION:
First thing to note, before we do the exercise:
1. Outside supporting aids (rein and leg) keep your horse on a circle that is slightly off the track, so you can monitor that you aren’t using the wall to replace your outside aids.
2. Outside rein keeps your horse connected and should be steadily holding him in the contact. If you feel like you need to pull back/sideways with this rein, it means you need to soften slightly and use more outside leg.
3. Inside rein softens and asks him to come deeper if he is too high/tight in his neck. Test this by keeping your outside aids and getting him to drop down lower by opening your inside rein inward (but not back). Inside leg helps you.
As you are riding a slightly smaller circle,
bring your ears over your shoulders,
keep your elbows in at your side,
sit on your outside seat bone,
bring your outside shoulder back
and then drop your weight into your inside, making sure to keep your inside hip to shoulder nice and tall… even though you have weighted your outside seatbone, you are now bringing your weight to the inside and keeping both sides of your body in place.
As you are reading this, try in your wheeled desk chair to turn in a circle with your inside seat bone and note where your torso goes (falls in and collapses on the inside?)… then try pushing with your outside seatbone, keeping your shoulder back, and putting weight into your inside leg and seat as you do it. Notice how the second keeps your torso more upright?
Linda said to think of fencing with your inside hand (where your outside supports and stays back). This is the correct way of staying upright and stable versus turning your horse like a bicycle (where your outside falls forward and your inside collapses). The correct way gives you the ability to stay upright and even with the horse. When you pay attention to your outside, you can more easily fill that outside supporting rein with contact and then the horse is through – even when you turn, do lateral work, etc.
This is not an exercise for everyone, but hopefully (for those who tend to collapse their middle and let go of their outside aids) this will help!