At the risk of sounding like a school-kid returning to class in the fall, I must say that I went to camp this summer. No, not to learn canoeing, nature crafts, or even dressage. I went to “saddle camp.” For the better part of a week, our group of eight, made up of professional saddle-fitters, tack-shop owners, riders, an insurance agent, a college professor and an assistant editor–me–bent over carpet-covered workbenches in a classroom at the Potomac Horse Center in Gaithersburg, Maryland. We used assorted-sized metal “flocking irons” and wooden “smashers” to push and shape soft wool into saddle panels, while our instructor, saddler David Young of Raleigh, North Carolina, looked on. “Put the flocking in there as light and fluffy as possible,” he told us. “Don’t let it ball up.” We heeded his word and worked intently, knowing an intensive five-part practical test and written exam loomed at week’s end.
As an Amazon Associate, Dressage Today may earn an affiliate commission when you buy through links on our site. Products links are selected by Dressage Today editors.
The course, sponsored by the Master Saddlers Association (MSA), was an education in equine anatomy and saddle fitting. As I realized at the time I enrolled in the course, it’s impossible to teach or to learn everything there is to know about these subjects in just five days. But you can take people who already know something about horses and saddle fitting, teach them the basics of what they don’t know and give them guidelines for standard saddle-fitting procedures. Going into the course, I knew I was the least experienced member of our group. But I really applied myself, soaking up every bit of information I could, and I passed the final exam–a major accomplishment in my book.
Of all the valuable lessons I learned during saddle camp, the nine points of saddle fitting is the one that I most want to share because it’s information that every rider can use. I’m also going to outline some of the details of my final exam to give you an idea of what goes into the education of a saddle-fitter.
Nine Fundamental Points
After a day’s lesson in equine anatomy by Joyce Harman, DVM, I had a renewed awareness of and appreciation for the skeletal structure, muscles, and ligaments that bear the weight of saddle and rider, and so are at the core of any study of saddle fit. Through Harman’s instructive slides and props and her straightforward presentation, I felt adequately prepared for the second day of class, which was devoted to the fundamentals of saddle fitting. Master Saddlers Association founder Gene Freeze began to build our foundation of understanding by introducing us to what he calls the nine points of saddle fitting–a basic checklist that zeros in on the most critical and readily identifiable aspects of a saddle’s suitability for a particular horse and rider.
Point 1: Saddle Position
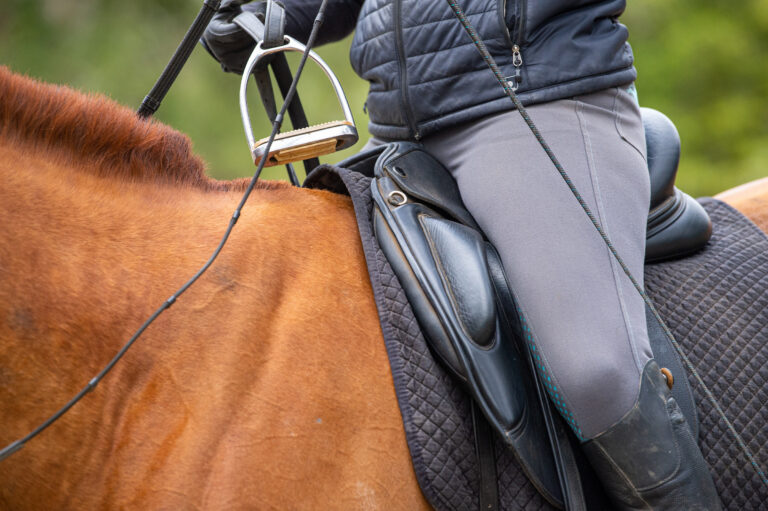
To begin our evaluation, Freeze emphasizes the importance of ensuring that the horse each of us is examining is standing squarely on level ground. I check my horse’s stance, then I proceed to place the saddle correctly without using a pad: I lay the saddle on the horse’s back, slightly forward on the withers. I put my left hand on the horse’s neck, just in front of the withers. Then I grab the saddle by the pommel with my right hand and I give it a sharp tug back and down. The saddle “locks in” when it is in the correct position. I repeat the process; the saddle stops in the same place each time.
According to Freeze, many riders place their saddles too far forward, which restricts the movement of the horse’s shoulder. The equine shoulder blade (scapula) moves backward by as much as three inches when the horse is in motion, so saddle placement must allow enough clearance for the shoulder to move freely. Ideally, the “points” of the saddle–the fingerlike extensions at the front and on both sides of the saddle tree–are far enough behind the back edge of the horse’s shoulder blade so that the saddle doesn’t interfere with movement.
Point 2: Level Seat
With the saddle correctly placed on the horse’s back–and the horse still standing squarely–Freeze now instructs us to look at the lowest point of the seat, which, in most cases, is centered between the pommel (the front of the saddle) and the cantle (the back of the saddle) as well as level. This is the ideal position because it allows a rider to sit comfortably and effectively deliver seat and leg aids without putting undo pressure on the horse’s back.
When the deepest point of the seat is too far back, the rider slides toward the cantle, loading the back panels and causing the horse to hollow his back. During the sitting trot, the rider also tends to rotate forward onto her crotch to compensate for that feeling of being “left behind.”
At the other extreme, if the saddle’s center is too far forward, the rider slides toward the pommel and feels pitched forward. Then the natural response is to brace against the leg, making the aids less effective.
A seat that is not level may indicate a serious saddle-fit problem, or it may simply mean that the panels require adjustment. As long as the saddle tree correctly fits the horse (which will become more apparent as you continue to evaluate the points on this checklist), it may be possible to adjust the level with flocking–extra natural or synthetic wool stuffing placed inside the panels.
Point 3: Pommel-to-Cantle Relationship
A dressage saddle’s cantle is higher than the pommel by virtue of its design, which takes into account the amount of sitting a dressage rider does. For comfort, the cantle conforms to the anatomy of a rider’s seat. If, however, the saddle is sitting slightly low behind–and as long as the saddle tree is not too narrow–a saddle fitter may be ale to add flocking to the back of the panel to raise the cantle.
Point 4: Clearance under the Pommel
To evaluate pommel clearance when no rider is in the saddle, Freeze now instructs us to first hold one of our hands perpendicular to the ground then to slide it into the space between the pommel and the horse’s withers. As a very general rule, two and one half to three fingers should fit into the space without feeling cramped or pinched. Assuming that the tree fits, if there isn’t sufficient room, a saddle fitter may be able to add flocking to raise and/or balance the saddle to ensure that it clear the horse’s withers.
Point 5: Point Angles
The points of the saddle tree determine the saddle’s width, and this is probably the most important aspect of evaluating a saddle’s suitability for a particular horse. When the width of the tree is not correct for a horse, the saddle does not fit.
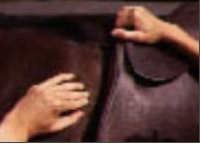
We begin this phase of our examination by lifting up the flaps of the saddle; the points are in front of the billet straps. Freeze tells us that on most saddles you can see what looks like a pocket. Inside this pocket, under the leather, lie the points of the saddle.
With the saddle in place on the horse, Freeze instructs us to look at the angle of the points in relation to the angle of the horse’s body. If the points are parallel to his body or within 10 degrees of parallel, the tree is the correct width for the horse. If the angle of the points is steeper than the angle of the horse’s body, the tree is too narrow. If the angle is greater, then it’s too wide.
When the angle is too narrow, the saddle will pinch the horse at the bottom of the points, causing discomfort. If the tree is too wide, it either will sit right on top of the withers, offering less-than-adequate clearance, or once loaded, it will rotate down in front, putting pressure on top of the panels.
Trying to mechanically alter an ill-fitting tree can break the points, shear rivets or affect the webbing that supports the seat as well as possibly void a saddle’s warranty. A factory-authorized representative should perform any tree adjustments, no matter how experienced your saddle fitter.
Point 6: Panel Pressure
Now Freeze shows us how to place one hand on the saddle and apply some pressure to simulate having a rider sit in the saddle. I place the palm of my other hand away from the horse. Then I run it from top to bottom under the points, checking for consistent pressure throughout. Next, I move my hand from front to back under the length of the panel, feeling for any pressure points or bridging–gap where the saddle does not touch the horse. Freeze emphasizes the importance of checking both sides of the saddle, since the majority of horses are not built exactly the same way on each side. Correcting pressure points or bridging requires adjusting the flocking.
Freeze also tells us that this is a good time to check for “rocking,” which concentrates the rider’s weight on one or two small areas of the horse’s back, often causing soreness. I put one hand on the pommel and the other on the cantle. Then I alternately press down with one hand and then the other. If the saddle rotates excessively on the center of the panel like a seesaw, the flocking probably is uneven and needs to be adjusted. Rocking also can be caused by a wrong-sized tree or inappropriately shaped panels.
Point 7: Gullet Clearance
For this part of the evaluation, I position myself near the horse’s hindquarters so I can look down the gullet–the open space between the panels–from the rear. Ideally, the gullet clears the entire length of the horse’s spine and does not touch the connective tissue on either side. Now I reach forward and push down on the cantle and I inspect the same area. As Freeze explains, sometimes when a horse is asymmetrical and weight is added to the saddle, it will shift and rest on the spine or the connective tissue, which is painful for the horse. This situation can be alleviated by adding flocking, changing how the saddle is girthed, and/or by adding a balance strap–an extra billet–to help keep the saddle from shifting when the horse is ridden.
Point 8: Length of the Saddle
The weight-bearing surface of a saddle should be between the horse’s wither area and the point where the last rib meets the spine. To find this point (technically known as T18), Freeze shows us how to locate the last rib and follow it with our fingers as far as we can. He explains that it may be hard to feel once we get up into the horse’s back-muscle area. If the saddle sits too far back beyond this point, it will rest on the lumbar region–the weakest part of a horse’s back–where it can cause injury, because the lumbar region cannot support a rider’s weight.
Point 9: Horse’s Response
During her anatomy presentation on our first day of the course, Harman had told us “the horse never lies.” He will tell you whether he is comfortable by his movements and actions. This is the acid test of saddle fitting.
A horse that moves freely, without hesitation or signs of distress, probably is wearing a saddle that fits him correctly. Most horses show a dramatic change in disposition and movement when an ill-fitting saddle is the source of pain. Dressage riders can look to saddle fit for clues when a horse just isn’t going “right,” and veterinary, dental, and showing problems have been ruled out. Saddle fit may be the reason a horse fidgets when approached with a saddle. It also may be why he collapses, “crabs” away, or hollows his back when his girth is tightened.
Final Exams
After almost a week of nonstop classes and hands-on work, we were ready for the five-part testing process. To begin, each student was presented with a horse and his saddle. Jan Cross, the owner of Justy, a 17-year-old Arabian gelding who was my test horse, brought him out for me to assess. Over the winter, Cross explained, Justy had suffered pituitary and ankle problems and was still in the process of gaining back the several hundred pounds he had lost while he was ill.
Right off the bat, I noticed that Justy was very asymmetrical: His left side was more steeply angled than his right. Because of this, Cross’s dressage saddle shifted to the left on Justy’s back when she rode. This interfered with the supraspinus ligament and the connective tissue on the gelding’s right side. In addition, I noted that the deepest part of the saddle’s seat was tipped back toward the cantle. Cross confirmed my observation when she mentioned that she was constantly fighting to keep her body position more forward whenever she rode.
To remedy Justy’s saddle-fit problems, I began by adding some flocking throughout both panels. Then I put a bit more in the back. To fix the shifting, however, required some brainstorming. Cross and I discussed several options, then decided that the best solution would be to use a small additional pad, called a shim, just under the rear of the left panel. I also recommended that she send her saddle to a local saddler to have a balance strap sewn on the right side to help keep the saddle from shifting left whenever she rode Justy.
Cross searched me out early the next morning to say how much better she was able to hold her position in the saddle as a result of my efforts. For the first time in a long while, Justy had given her some good lateral work, she said, and he seemed happy about it.
I sighed with relief. That was one test down, four more to go. Friday was the big day. We had to demonstrate our ability to make templates–models–of a horse’s back using a flexible architect’s tool. Then we had to go through the nine points of saddle fitting, do a back examination that included naming the pertinent anatomical structures, and complete a 20-question essay.
In the end, I was one of five “campers” who made the grade by passing all of the tests. However, I’m not planning to hang out my saddle-fitter’s shingle just yet. I’m at least a year of practice and apprenticing away from feeling comfortable enough to do that. Besides, I have too many stories to write. Even now, I can hear my editor calling.
The Master Saddlers Association
A new organization, the Master Saddlers Assocation (MSA) was started this year by Gene Freeze of County Saddlery in Woodbine, Maryland. Freeze is the only person in the United States registered as a saddle fitter by England’s Society of Master Saddlers (SMS). He started the U.S. program because of what he sees as a lack of qualified professional saddle fitters.
The mission of MSA is to educate horse owners and riders about proper saddle fit, to protect the well-being of the horse, and to set professional standards for saddle fitters. MSA is based on the principles of SMS and includes a professional code of conduct and standardized guidelines for certified saddle fitters to follow. The organization plans to run certification courses for all levels several times a year.
According to Freeze, it is important for consumers to know the difference between saddle makers and saddle fitters. A saddle maker does not necessarily know how to properly fit a saddle, just as a saddle fitter may not know how to construct a saddle.
To locate a certified saddle fitter in your area or to find out about becoming certified, call MSA at (301) 570-3100.
Stacey Nedrow-Wigmore is a life-long horseperson and assistant editor for Dressage Today magazine. Her article won a first place award for service to the reader in the recent American Horse Publications contest.
This article first appeared in the October, 2000 issue of Dressage Today magazine
Dressage Today is the premier source of information for all riders dedicated to improving their riding through the universal training technique of dressage. Subscribe using our secure online subscription form.


