Rider 1—Improve Contact
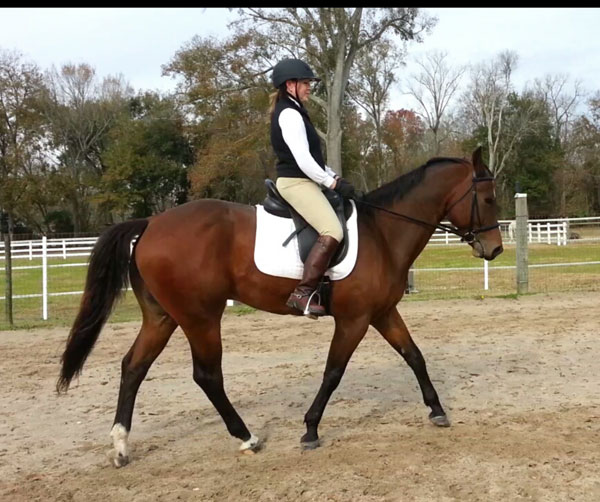
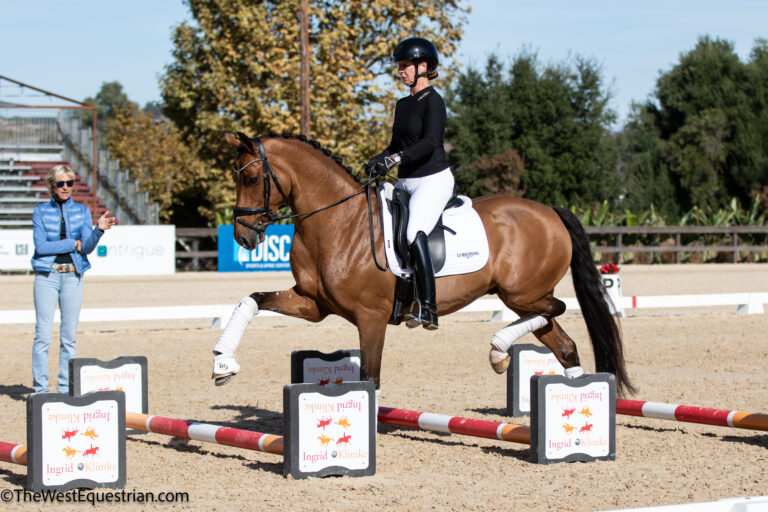
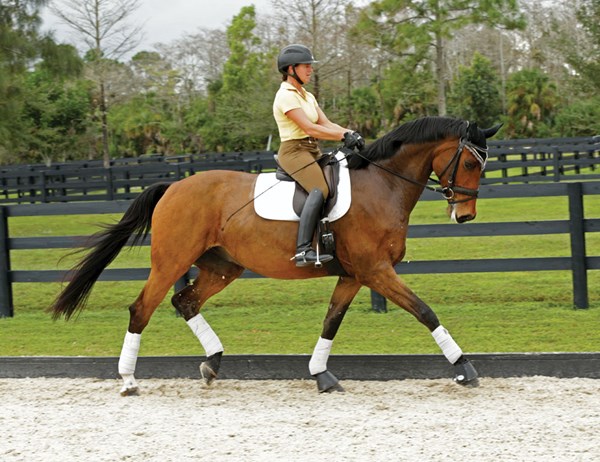
This is a photo of Ann Arcement and Invitation to Skip, a 5-year-old Quarter Horse gelding learning the ropes in dressage. I am very excited to critique this pair, since I see some general problems other riders are facing and, hopefully, analyzing this photo will be helpful to both the rider and several of “The Clinic” readers.
This rider is clearly trying to sit straight and upright, keeping her leg on and riding her horse into the contact. The result should be a supple horse that steps under the rider’s weight and balances in the contact by rounding his neck and carrying with his topline. However, the horse in this photo keeps his croup high, does not step far enough under the rider’s weight, drops his shoulders and becomes tense in the neck. As a result, he is above the bit.
Every rider knows this situation, and often a few moments later the acceptance of the contact can get much better. Sometimes, trying too hard to do the right thing can result in incorrect tension. The more we try to be correct, the more problems we face. Finding the right way to avoid such vicious circles or to get out of them again is not always easy.
The difficulty many riders who start dressage face is that there are many things that are hard to understand: “sit deep, but light; flex the horse to the inside, but keep the outside rein; ride slow, but keep the hind leg quick …”
Explaining the aids the rider should be using is often too technical, and these aids only “come to life” when the rider feels how to use them properly. Since every rider and horse is a unique individual it is difficult to find the right terminology for everyone.
Ann is keeping her upper body nicely upright, looking straight ahead with relaxed, deep shoulders and holding her hands low. Her leg position shows a slight tension around her knee and lower leg. This is easy to identify when you notice that she is turning her foot to the outside and her heel is pulled up a bit.
Her basic seat is not bad, but still her horse is not engaged enough from behind and does not work over his back onto the bit. The point that is missing in this photo is a natural flow of forward energy that creates more harmony. Ann needs to be careful that her legs and hands are not restricting the horse’s desire to move forward. Putting her leg on with tension around her knee can cause unwanted tension in her horse’s back and prevent his hind legs from stepping forward. Keeping her hands too close to her body can sometimes restrict the freedom of her horse’s shoulder movement.
Her horse shows some more muscles over his hind end but is not yet developed enough around his shoulders. He needs to learn how to round his back more, using his abdominal muscles, and lengthen the topline of his neck to achieve more self-carriage and balance. To achieve this, he needs to be ridden in a slightly lower frame so that when he seeks the contact, he does so by stretching his neck forward and downward.
Try this: It can be helpful to practice lengthening and shortening of the reins to adjust your horse’s frame and develop self-carriage and balance. To do this, start in walk on a long rein with no contact. Relax your legs from your hips, just feeling the light contact of your calf (approximately one hand below the knee) on your horse’s side. Make sure your horse is walking regularly and freely forward before you start shortening the reins. While establishing contact, your horse should maintain the same quality of walk. This ensures that your horse is balancing himself properly and that your reins are not restricting the freedom in his shoulder.
I rode with one international trainer who would not allow his students to start trotting before they could do this. This may be a bit extreme, but many problems some riders normally run into did not occur after they had managed to do this to his satisfaction in walk first.
Once you have achieved success in walk, you can progress to the same exercise in trot and canter. In these gaits, this exercise serves as a nice check of the horse’s balance and suppleness when the rider can lengthen and shorten her reins with her horse following without tension. The better a horse stretches through his topline, the easier it will be to lift his back. This can enable and encourage the hind legs to step more under the rider’s weight as well.
In the timing of the aids, the rider should always remember to give a little interplay of time between the legs and the hands, otherwise one creates unwanted tension by stepping on the gas and brakes (saying “go” and “stop”) at the same time.
Enjoy the journey of dressage!
Rider 2—Develop Balance
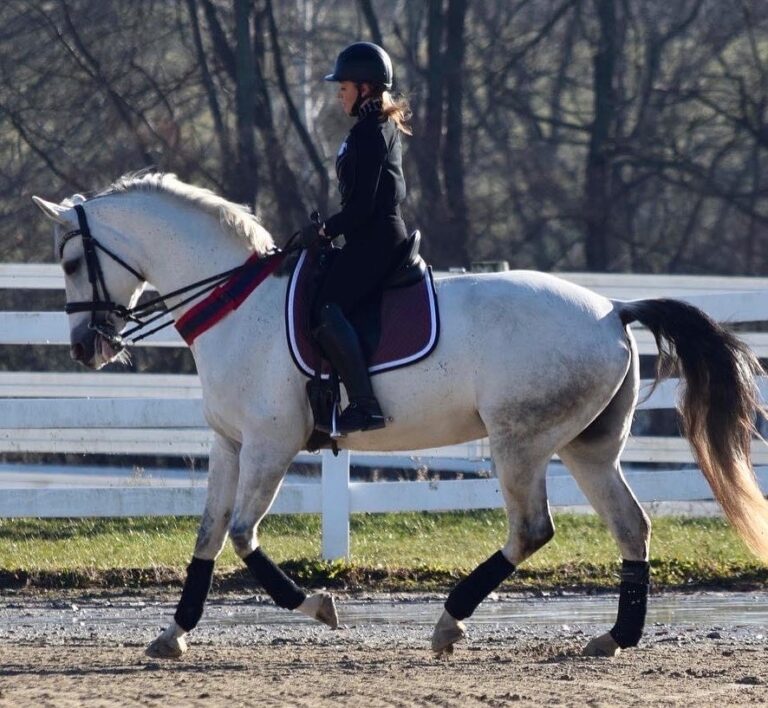
This is a photo of Susan Do riding her 11-year-old Paint mare, Cali. Susan describes Cali as a wonderful, but very opinionated, mare showing some resistance when asked to work, which revolves around her lack of activity behind and desire to escape through her shoulder in bending exercises.
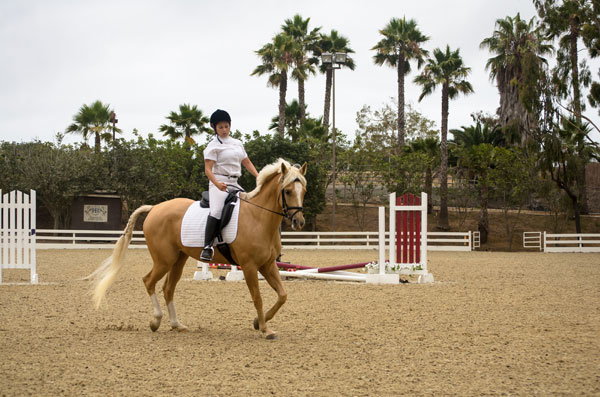
This photo may not be an ideal moment or an ideal angle, but it shows her problems. Therefore, a photo like this sometimes can be more valuable to understanding and helping the situation.
Susan is trying to turn Cali to the right in this photo, and I can see that this turn is lacking balance. Cali is escaping through her outside shoulder and not working through her back. In an attempt to turn her horse, Susan is using too much inside rein, which blocks Cali’s inside shoulder from stepping toward the desired direction.
Susan is shifting her weight toward the right, collapsing her right side and tilting her shoulders and neck to the right. In this position, Susan’s inside (right) seat bone may carry more weight but is actually pushing Cali out, causing unwanted tension as the horse gets contradicting messages at the same time.
Try this: To improve the quality of a horse’s bend during corners and turns, work on your own balance and ability to shift your weight on your seat bones, then consider the correct timing of your aids. Here is how:
When shifting the weight toward the inside seat bone, make sure that your seat bone pushes into the direction you want to ride. This will help to lengthen the inside of your body more and create more stability in turns.
This can be felt and practiced on a chair as well. Feeling the direction the seat bones are pushing is more important than how much weight one seat bone is carrying, since the horse can get the message of which direction to head from either seat bone.
Once you have an understanding of balance and how your seat bones are directing your horse, you can then focus on the timing of your aids. To help (aid!) the horse to better balance in the turns, start by focusing on her inside front leg. Since a horse’s inside leg moves straight forward in a turn while her outside leg crosses over, the balance and forward flow of the movement during the corner is greatly affected by this inside front leg.
Old masters have written that good half passes always start with the first lateral step of the inside front leg—this is true for good corners as well.
Try jogging a corner yourself and notice how much harder it is to stay in balance when you don’t pick up your inside foot fast enough.
In the photo I can see that Cali is placing her right (inside) front leg down in such a way that a truly balanced turn to the right is not possible. Susan should ride Cali on a straight line and develop her feel for her horse’s footfalls.
Once she has a feel for when that inside front leg hits the ground, she can shift her weight, adjust her seat bones and coordinate her aids as we practiced earlier. As a result, Cali will feel more secure to start the corner.
Susan should count how many steps Cali needs for a corner and straighten her after the corner to improve her balance even more.
I hope that this advice is helpful for all riders who struggle with turns and corners.
Send Your Photo
You can submit your high-resolution dressage photo for critique (300 dpi and 4 by 6 inches in size). Or you can send your photo with a link to a short video. Email to DressageToday@AimMedia.com. Turnout in dressage show or clinic-appropriate attire is encouraged.
Don’t forget your helmet!


