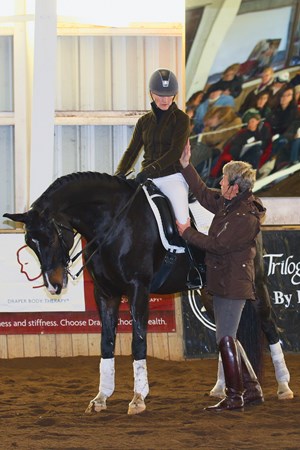
Kyra Kyrklund, five-time Finnish Olympian and popular clinician, was the star of the New England Dressage Association’s (NEDA) 2011 Fall Symposium. Kyrklund, who lives and trains in the United Kingdom, arrived to share her wisdom amidst the chaos of an early snowstorm that left many people without power. Yet hundreds of last-minute, truth-seeking dressage fans appeared at the symposium as nonregistered attendees, challenging the capacity of the facility. The topic was “focus on collection and the tools for achieving it.” Throughout the story that follows, Beth Baumert’s observations are in italics.
1. What is “Collection”? Collection is not a quality that is either turned on or off. There are greater and lesser degrees of collection, and even the horse that is just started under saddle has to collect somewhat. When you ask for collection, the horse’s back should make an arched bridge, not a hanging bridge. (Kyra holds a flexible whip with a hand at each end and bends it, arching it upward.) The horse’s rib cage hangs from his backbone, and all the weight of his organs is in there, making it natural for the bridge to sag. (She bends the whip so it sags in the middle; then she arches it upward again.) If he can lift his tummy muscles, then the rib cage lifts instead of hangs. Don’t collect him more than you can keep him straight. (Now the whip bulges out to the side.) Both sides of the horse have to be collected. (And the whip arches happily upward again.)
The horse takes shorter, higher steps in collection, but collection starts with the horse collecting in his body. (Kyra stands next to a horse and spreads her arms between his butt and his shoulder.) When the judge complains that the horse’s frame is too short, it is usually the neck that is too short, and the horse’s body is often too long. When you get his body collected, you should try to let the neck get longer not by throwing it away, but by feeling his mouth go forward.
All muscles work in opposition. As one shortens, another lengthens. In collection, the horse’s topline lengthens and his bottomline shortens. It’s hard to lengthen the topline, but if you shorten the bottom line by asking the horse to tighten his tummy muscles, it becomes easier. When the horse’s tummy muscles tighten, his rib cage and the base of his neck come up and his hind legs swing under more easily.
2. Lifting the Horse’s Rib Cage. (Kyra rides most of the horses and talks as she rides.) The lowest part of the rider’s leg—the foot—“pumps up” the horse’s rib cage. It’s like putting air into a balloon. I use my foot a little quicker than my horse offers. If you don’t put enough air in the balloon, then it sags down. If there is too much air, then the balloon explodes. (As she rides, Kyra says, “The balloon needs more air. I almost have a flat tire here.” Then she pumps up the horse. His rib cage lifts, the backbone appears to get longer and it lifts the rider.) The rider’s seat then bounces the balloon.
The more the tummy muscles tighten, the more the back comes up and the horse gets collected in his body. I collect his body without letting him run away, first by using the leg. Then my rein is prepared to tell the horse not to go faster. Then he makes short steps in the rhythm I want. Once the horse is collected in the body, then you can ask the steps to be more energetic.
3. The Rider’s Weight. The rider’s most important aid is his weight. The weight is the aid that never goes away— unlike the hand and leg aids that you can release. You need to sit with your weight in the middle of the horse, stabilize your center of gravity by using your tummy muscles and put it on top of your horse’s center of gravity. The younger the horse, the farther forward his center of gravity is.
If you are able to stay in the middle, then you can influence your horse with your weight. You can balance him instead of his needing to move right and left to balance you. The higher the rider’s center of gravity, the more unstable she is. The rider has to drop her weight down in order for the horse to carry it easily. She can use her own body weight to let her seat down in the saddle—rather than push it down—then activate the hind legs underneath.
If you have trouble keeping your weight low, attach a strap (Kyra uses a flash noseband) to the D of the saddle on the outside. Holding onto the strap with your outside hand, you can pull yourself into a deeper place in the saddle. The outside rein is then always the same, and you turn the horse with the inside rein and outside leg. This steady outside rein also tells the horse, “I want your frame to be, specifically, this long.”
4. On the Bit. Have the feeling that your horse’s neck is going away from you, not that his nose is coming toward you. “On the bit” is not so much about keeping the nose on the vertical, but rather that the horse is carrying himself. Stay heavy in your seat and feel that the transitions start with your horse’s back.
5. Who is the Leader? After 10 strides, the horse knows if he is the leader or if his rider is the leader.
6. For Teachers. Always look at the whole picture. When I look at a horse and rider, there are many places where I could start, but I must remember that the rider can change only one thing at a time. Many trainers are too ambitious. I try to start with the most underlying issue that can fix more than one problem. However, my way is not the only way to Rome. Another trainer might have a way that also works well. As a trainer, you can’t be stubborn because if your student doesn’t understand, you must be flexible and perhaps take another road.
7. For Students. It is important to know that change is difficult and takes time. It takes 5,000 repetitions just to break an old habit and then 100,000 repetitions before the new behavior becomes automatic. The new behavior goes from the “big brain” where you need to be thinking consciously of it all the time, and finally to the “small brain” where the behavior is automatic. If you can compare the new behavior to something you’ve done before, you can reduce the need to do the new behavior 100,000 times. For example, if you have trouble holding your hands with your thumbs up, imagine holding a champagne glass so none of the precious liquid spills. You can also create change more easily if the benefit is high. If you can feel a positive change in your horse, you will achieve change more easily.
If you do what you’ve always done, you will be more comfortable, even if your horse does not perform well. If you persist with making a change, you might get a bit weaker at first, but you will improve in the end. Excellence requires 10,000 hours of practice and repetition.
8. For Novices. The difference between a very good rider and an average rider is that the very good rider is more persistent about the basics. All riders, at every level, struggle to sit as well as possible. All riders struggle to get the horse through and on the aids. The same control is necessary at all levels, but at the higher levels, the aids are more refined.
If we ask novice riders how much of their focus is on the horse’s head, most of them, if they are honest, might say 80 percent. But the head is perhaps 10 percent of the horse’s body, so be sure you are not using 80 percent of your focus on 10 percent of the horse. Ride his body and influence it.
As a novice, you can even influence your horse’s upper-level training. The amateur rider trotting his horse correctly on a 20-meter circle lays the foundation for the beginning of piaffe and passage. The rider cantering correctly on the 20-meter circle is making the first step toward pirouette.
The best learning is from a schoolmaster who gives you the right feeling, and then you can reproduce that on another horse.
9. The Rider’s Knee & Elbow. The rider’s knee is like an arrow. It gives the horse direction by showing him where to go. The two knees make a corridor, and the energy of the horse flows through the corridor. (Kyra moves a rider’s lower leg too far back, saying, “Don’t point the arrows down.”) Feel the contact in your elbow, not in your hand. Then almost feel that you do the rein aids with the elbow so the hand can stay soft.
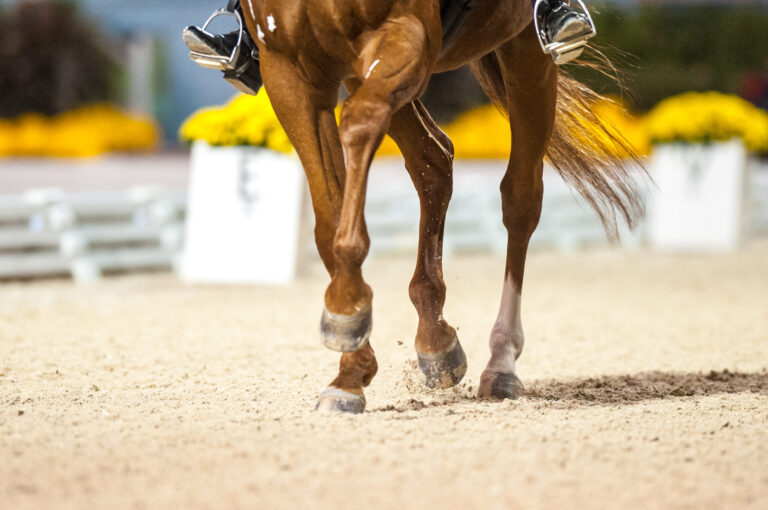
10. The Horse’s Hind Leg. The horse’s hind leg moves like a pendulum. Some hind legs do not swing forward and back equally. Some will always be better at pushing than carrying.
11. Independent Aids: Stop, Go, Turn. Use your aids independently and intentionally. For example, use the rein or do not use the rein, but when you use it, be sure you don’t use another aid unintentionally at the same time.
Separate the aids. The hands mean stop. Be sure your horse will stop from the rein aid, and be sure you then release, which is his reward. The leg means go, and when the horse goes forward from it, the leg must then release. If you inadvertently use the legs all the time, he will be slow to respond to them.
When I can go and stop, I ask for turns. I keep contact with the outside rein and turn him with the inside rein and outside leg. In this way, I move the horse’s shoulders, not the head, until he finds his own balance.
12. The Crooked Horse. It doesn’t do any good if one side of your horse is collected and the other is long. The crooked horse doesn’t want to carry you on one side. Move the shoulders until your horse works equally on both sides, and never mind if his head is pointed to the outside. Don’t ride his legs, ride his back.
The problem isn’t the stiff side. Keep contact with the rein he doesn’t want to accept, and give and take on the heavy rein until the balloon-like rib cage is in the middle. It can also help to bridge the reins, which will automatically give the rider equal contact. Leg yield also helps to put the horse to the rein he doesn’t want to accept.
13. How Horses Learn. Horses are basically lazy. They would rather be eating grass in the field than jumping or doing dressage, but the rider can make training fun for the horse. Learning can be an “Aha” experience for him, and the easier you make his progress, the happier he will be to perform for you. Try to ride so it’s easy for your horse to do what you want.
Horses learn by pressure and release. You apply pressure, they respond, and you must release the pressure. If you don’t release—for example, if you don’t let the rein loose—you can’t use it again.
Don’t focus on the bad points. Acknowledge them, but focus on the positive points and build on them. Feel the good steps and try to get them for longer periods of time. If I say “good” to my horse, it may not be actually good, but I want to tell him that he’s on the right way.
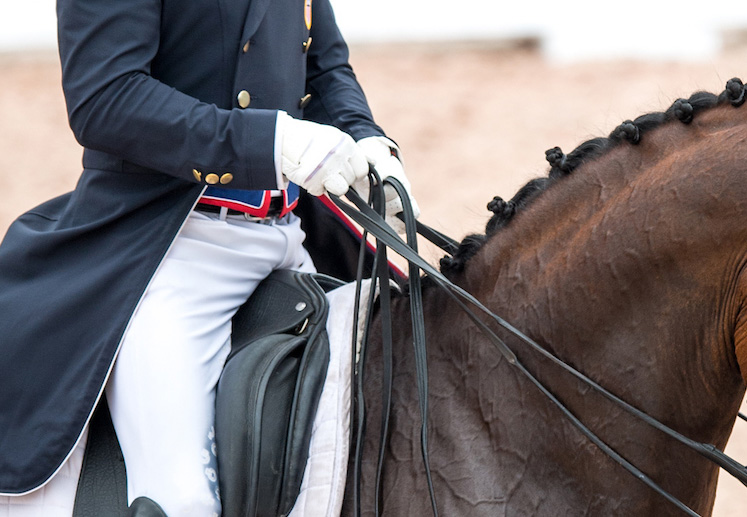
14. The Double Bridle. If a horse accepts the snaffle but not the double bridle, the rider probably doesn’t know how to use the curb. One of the double-bridle skills is to know which rein you are using intentionally. Use the curb when you need it. The bridoon— snaffle—brings the horse’s neck up, and the curb brings it down, so be sure you are not trying to bring him up with the curb or down with the bridoon.
Dare to try something new. Using the Fillis method of holding the reins (shown above) is not new, but it has been forgotten. It causes the correct rein to engage automatically. When the horse’s head goes up, the curb gets naturally stronger, and when the horse is too low, the bridoon engages and naturally gets stronger. The rider doesn’t need to do anything to get the desired effect.
15. The Walk. I work quite a lot in the walk. What you and your horse can’t do slowly, you can’t do at the speed of trot or canter either.
16. The Passage. There are many passages. There is the one that the judges will give a ten, but you can’t do piaffe from that one. You need to be able to do ones that are smaller too.
(Kyra notices a horse offering a passage that isn’t level.) Why is he taking a big step with the right hind? Because he doesn’t take enough weight on the left hind. Make him stay on the left hind longer. Think more of the down than the up. Don’t think of lift, lift, lift. Think of bounce, bounce, bounce. Bump your seat in the rhythm you want. If he gets too slow, bump quicker so you can influence the speed of the steps. Think of quicker, higher steps.
17. The Comfort Zone. When you are in the Comfort Zone, you can ride without thinking. In the Stretch Zone, you are working on something you can’t do by habit. In the Panic Zone, you can’t think clearly and are paralyzed. These zones apply to both horses and riders. If both horse and rider go into the panic zone, they lose control, and it spells trouble for the future. Some horses go into the Panic Zone very quickly. They need riders who are comfortable.
Participants and auditors at Kyra Kyrklund events always feel satisfied in the end because of her sense of humor and wisdom couched in a deep love for horses. When the weekend was over, everyone found their way back through the neighborhoods of downed power lines and snow banks armed with new ideas and methods to try.
Kyra Kyrklund is among the most famous dressage trainers in the world. She has trained many horses to Grand Prix, and her students include Jan Brink, Catherine Haddad Staller and Leslie Morse. Born in Helsinki, Finland, she grew up and developed her love of horses in Stockholm, Sweden, where she trained with Walter Christensen. Later she rode in Germany with Herbert Rehbein. She went on to represent Finland in six Olympic Games, earn a silver medal at the World Equestrian Games in 1990 and win the World Cup Final in 1991 with Matador. She lives in West Sussex, UK, with her husband and fellow trainer Richard White (kyrak.com).