As I near about 25 years of practicing dressage, it’s become crystal clear to me what the bottom line is and what it’s all about. Dressage training is not just about winning blue ribbons. It’s about becoming competent riders who can develop our horses into healthy, balanced and rideable athletes. The point is to give our horses a sense of strength and body awareness, which makes them better throughout their lives. Keeping this in mind helps me understand what my horses need in daily training.
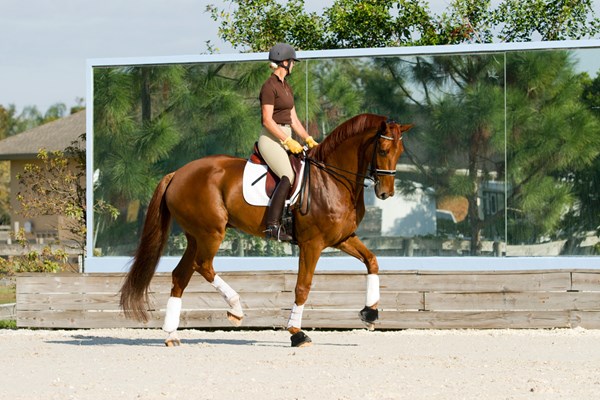
The end result of a well-trained dressage horse at Grand Prix is a horse that presents a beautiful picture: The haunches are lowered and the back is strong and supple. The withers are lifted, giving the shoulders lots of freedom to flow and show expressive movement. The neck is naturally carried in a beautiful, round and supple shape, and the poll easily accepts the contact. The balance is so exact that you could imagine the horse being able to work on a gymnast’s balance beam. All of these attributes are natural for the horse in certain states of excitement. That’s something important to keep in mind.
Because getting to Grand Prix is usually a dressage rider’s ultimate goal, it’s likely that this beautiful picture of a well-trained Grand Prix horse is in her mind while practicing. The problem is that all the necessary ingredients and steps underlying the finished product aren’t always obvious or instinctual. In this article, I will go through the things I find are effective in getting a horse to offer the rider the end result in a way that feels “equine-made” and not man-made.
Whether you are starting to train a young horse or trying to raise the quality of the work with your advanced horse, the following exercises can apply. The green horse can learn from precise riding from the start, but advanced horses can benefit from going back to the basics, too. With my competitive horse Paragon, I have used nothing other than basic, clear and simple communication to train him, keeping him balanced, bringing out his highest athletic potential. Whether you have a horse like him with tons of talent or one with average abilities, the physics and equine psychology used are the same. If you understand them, you can bring out your horse’s potential, too.
Rider Position and Biomechanics
The first thing you have to start with is your responsibility for your own body awareness and your ability to understand the biomechanics between you and your horse. Biomechanics is not about sitting in a pretty position but understanding the forces put on your body by your horse’s movement and how to match those forces in the proper directions at the proper times. Sitting well on your horse is much more difficult than just relaxing and following his movement. If that were the case, many more riders would be quite good. Who can’t chill out and relax? It’s not that difficult until the seat you are sitting on starts moving with lots of power and motion and in many directions, and you try to create expression and movement. Really good riders who seem to expend little effort while sitting on big moving horses aren’t up there simply being loose and relaxed. It’s the same with an elite figure skater making her routine look easy or a ballerina seeming to defy gravity as she floats across the stage. They are all athletes working hard to look relaxed and understanding balance, strength and body awareness to an amazing level of detail. It’s very necessary for riders, too. My biomechanics coach and mentor, Mary Wanless, talks more about this in the article on page 54. In order to assume that your communication with your horse will be clear and fair, you have to be sitting on him in a way that your balance does not negatively affect him or or cause conflicts of information (see “The Good Seat” on p. 49).
There is more to learn about biomechanics and, in fact, the higher I go in my own riding, the more detail comes up and with fascinating effects on my horse. But every rider’s body is different so their lessons should all be different too. It’s a great idea to get with a biomechanics expert to find out what you need because it’s almost impossible to do alone.
When I describe the following exercises to help your horse with his performance, I am assuming your body is well-aligned and sorted out.
Exercise 1, Walk–Halt–Walk Transitions
These simple transitions can do a lot, but only if you’re strict and picky. Breakdown the transitions so you pay close attention to the forward and slowing aids. Let’s first confirm the forward aid:
1. Starting from halt, ask your horse to walk by using a very light kick with both lower legs and nothing else. Since horses can feel something as light as a fly on their side, that should be enough.
2. If your horse moves off with no delay whatsoever, that’s a good response, and you can praise him and move on.
3. If he is delayed in his response or lacking “Yes, Ma’am” enthusiasm, quickly give him a disciplinary kick (or tap of the whip in some cases) to tell him he was wrong for not listening. Important note: That’s a punishment, not an aid.
4. Go back to halt and try it again with a light aid. Until your horse goes with an instant “Yes, Ma’am” from a light aid, you need to repeat the process.
When you get this simple concept through to your horse, you’ll have what I consider a “forward” horse that’s in front of the leg.
Forward is only useful if your horse is equally adept at stopping. Stopping muscles are more often neglected or misunderstood in training dressage horses. The muscles a horse engages to stop and move his center of gravity back onto his haunches are his core and the thoracic sling. The thoracic-sling muscles attach the front legs to the body and, when contracted, raise the rib cage. Teaching your horse to stop with promptness is a way to get him to engage these muscles.
1. Start from walk on a straight line then close your hands, without pulling them back, to tell your horse to stop. Do not lean back and push your feet any harder into the stirrups while doing this. As soon as he halts, release the rein.
2. If he stops within two steps, without hesitation or pulling on your hand, and stays in halt when you give the rein, that’s a very good response, and you can praise him.
3. If he takes too long to stop or it takes too strong an aid, once you get to halt, take a step backward. Once he does that, release the rein and pet him. The step backward is a chance for him to engage his thoracic-sling muscles. When he does and gets praise for it, he’ll associate the closing of the hand with engaging those muscles as the correct response. A helpful hint that he has successfully engaged his thoracic sling is when you give the rein away after the transition, he shouldn’t accelerate just from the lack of rein. Lack of rein shouldn’t mean go. If he remains on the forehand after the down transition, he’ll most likely move forward when you give the rein even if you didn’t tell him to go from a leg aid.
If he won’t take a step backward, sometimes it helps to have someone on the ground tap him on the chest with the handle of a whip just strong enough to help influence him to step backward. I don’t suggest kicking to make your horse go back since I believe the leg should mean forward.
4. Repeat these halt transitions until they happen easily and consistently. Now that you have your horse doing quality, prompt and enthusiastic walk–halt–walk transitions, we can go on.
Exercise 2, Trot–Halt–Trot Transitions
Once your horse does walk–halt–walk transitions well, moving up to trot–halt–trot transitions should be fairly easy. But keep it simple. It’s important that you don’t focus directly on your horse’s frame when first breaking down these transitions. Since the trot–halt–trot transitions are more difficult, your horse may not stay perfectly round until he understands the exercise and has the strength and awareness that it’s about his core and balance first. He must maintain the instant “Yes, Ma’am” to your aids as before. Moving up to trot–halt–trot transitions makes it even more demanding that he remain obedient to the aids and that he’s aware of his balance. Many horses make forward transitions by first letting go of their thoracic sling, moving their center of gravity forward, going in front-wheel drive and probably becoming resistant or heavy in the bridle because of it.
With this in mind, don’t be tempted to try to keep the roundness in the bridle. In this case, going above the bit is just a symptom and not a cause. I don’t ever suggest trying to prevent symptoms but instead recommend staying focused on the cause. The very moment you recognize you horse has made his forward transition like that, and his head going up is the result, quickly show him another halt transition that will remind him of his thoracic sling. If you catch it every time, he’ll learn quickly what you’re after.
1. Start from halt.
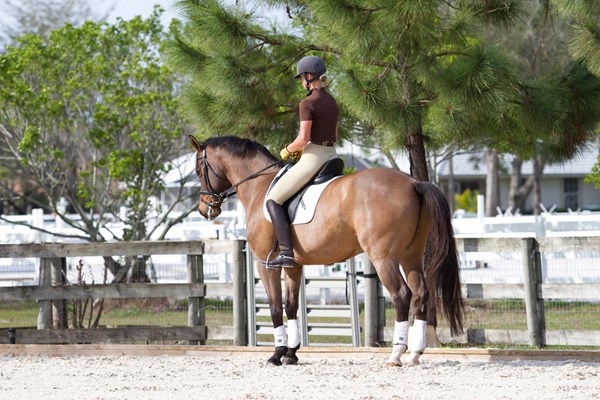
2. Ask for the trot with an almost invisible, light kick with both lower legs. Keep a light rein contact that is not restricting your horse’s reaction to go forward, even if his head goes up.
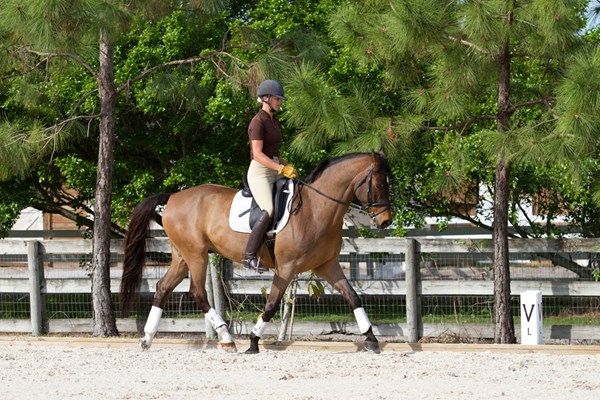
3. If he responds with an eager “Yes, Ma’am” and tries his best to do it as quickly as possible, that’s a great response, and you can reward him for it.
4. If he delays his response, proceed the way you did in the halt–walk transition. If you have to use discipline, always come back to the starting point and try again as soon as you can.
5. When you ask for trot, if his response is delayed, he loses balance, pushes his hind legs out behind him or tries to pull on your hand, quickly bring him back to halt to remind him of his thoracic-sling muscles and that they must stay engaged. Try to do this quickly, as soon as you feel it happen.
6. If it takes you a long time to get back to halt or when you get there, you don’t sense that he moves his balance back where it should be, again take a step or two of rein-back to show him where to be in his body.
With repetition of these simple transitions, your horse will learn to keep his balance in a more consistent place, making it easier for him to accommodate the rein contact and come naturally into a much better equine-made frame.
The Good Seat
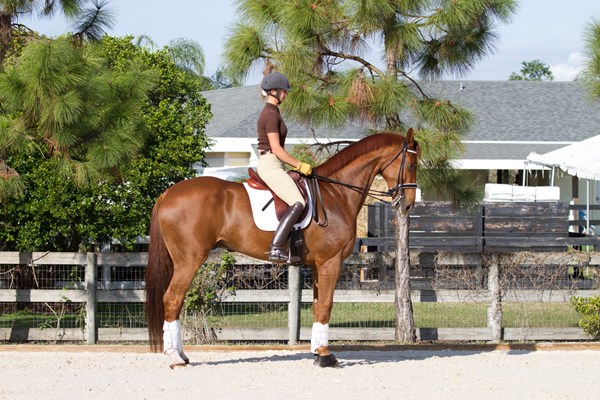
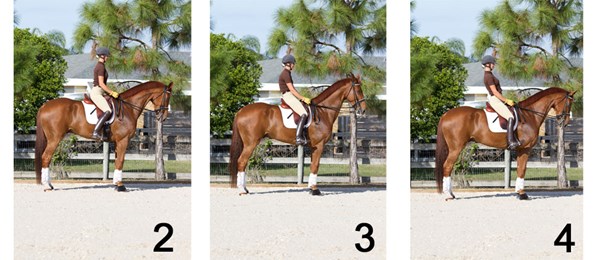
Getting lined up vertically from shoulder to hip to heel is a good place to start (see Photo 1). Your pelvis should remain in a vertical position throughout the ride with your seat bones aiming directly down; your lower back is neither rounded nor hollow (see Photos 2 and 3). Your abdominal and lower back muscles should be toned enough to keep that part of your body stabilized and still. Your vertebrae should not articulate to absorb the up and down of your horse’s movement. Your thigh should be resting snuggly, inwardly rotated and on the saddle at a 45-degree angle, and there should be a defined amount of bend in your knee to maintain leverage and stability in your half halts. Your foot should be lightly resting in the stirrup, without pressing your heels lower than your toe. The old-school theory of having your legs as long around the horse as possible makes it almost impossible to have an independent seat. Even if you’re short, dropping your stirrups and extending your knee so that you seem to have a longer leg is not effective. You will rob yourself of leverage and become stronger in your shoulders, stirrups and hands. Photo 4 shows how these mistakes in your position could cause you to make half halts in much the same way as a water skier pulls on the tow rope.
Exercise 3, Canter–Walk–Canter Transitions
Once your trot–halt–trot transitions are good and your horse starts to prove to you that he is becoming more body aware, you can try these concepts in canter–walk–canter transitions. Since he is now prepared to listen with sensitivity and balance, your horse should find it easy to go from walk to canter, or canter to walk, at your request.
1. Starting in walk, test that your horse will listen to the aids for quick go–stop transitions several times before asking for the canter. If he doesn’t, then spend time on that before looking for the canter transition.
2. Once he’s in the right mindset and balance, signal him to canter with the following aids: a very light tap of your outside leg a bit farther back than its normal position and your inside leg in its normal position at the time that his inside front foot is touching the ground in the walk.
3. If he goes into canter immediately, without accelerating too much, and stays in balance, that’s a great response and you can praise him for it.
4. If there is a delay in his response, immediately abandon trying to get the canter and go right away to the discipline of keeping him sensitive and reactive. Then come back to the walk and try again, making sure that when you ask for canter you keep your aid very light and easy. It’s a natural instinct for riders to come back for the second try with a stronger leg aid since the horse didn’t react quickly enough, but that just teaches the horse that the rider will work harder than she has to and it will end up being much too difficult and inaccurate and it will result in aids that are too strong, in the long run.
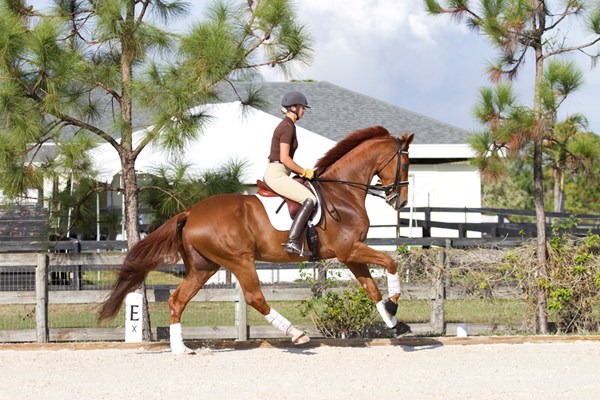
Try not to think of the canter transition as a large amount of acceleration, just a change of gait with the same balance and rideability you had in walk. Canter–walk transitions require a bit of collection in the canter before you make the transition:
1. Try to engage your horse’s thoracic sling in canter before you ask for walk. Without leaning back or pushing your feet into the stirrups harder, close both hands, without pulling back, to ask for the walk. Leaning back will not engage your horse’s hind legs, it only pushes your seat forward, forcing your horse’s balance forward onto their forehand.
2. If he comes to walk and stays in balance and doesn’t continue to pull on your hand, that’s a great response, and he can be praised for it.
3. If he isn’t balanced enough in the canter when you ask for walk, he’ll probably trot a few steps, be heavy in your hand and possibly resist and be above the bit. In this case, don’t worry about his frame, just try to get to walk as quickly as possible and then halt and, in some cases, rein-back to get to the point where he has engaged his thoracic core.
4. Resist the temptation to try to keep him round if this is how he does the transitions at first.
5. Do a few repetitions and see how quickly he learns to do the canter–walk transition in a better balance with his core engaged, increasing his chance of staying nice in the bridle.
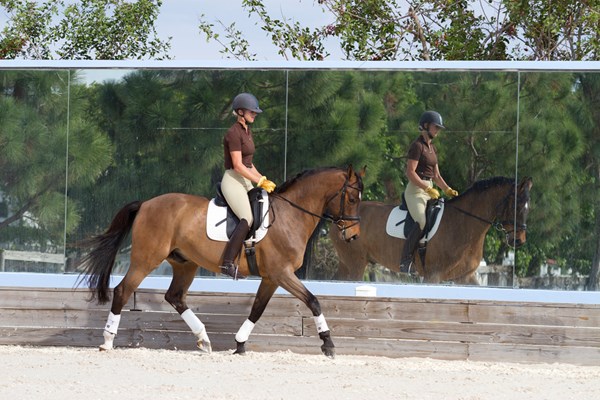
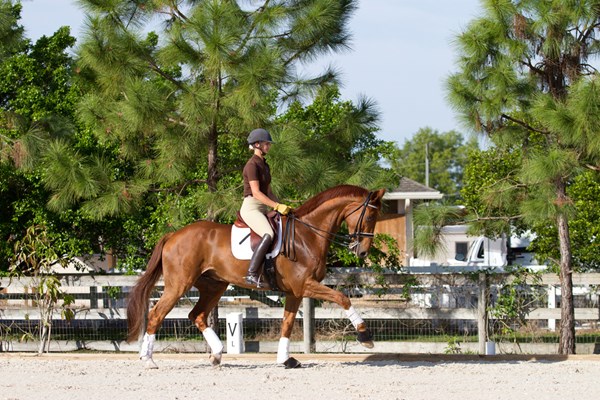
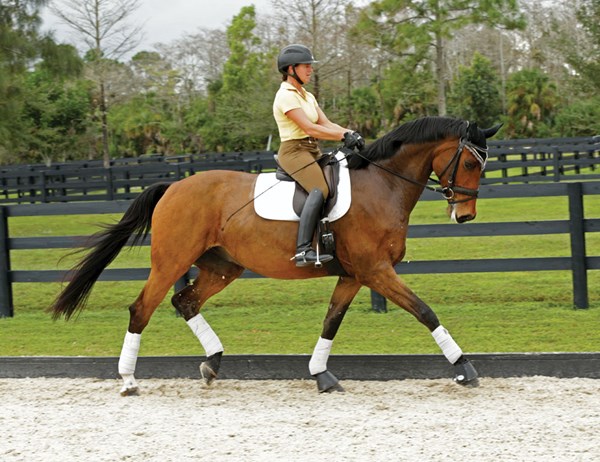
Compared to Jimmy Choo (above), who has not been working on these exercises as long, Paragon (below) shows that he is further along in developing his equine-made frame. He has a comparably higher wither, freer shoulder and lower croup,which allows him to round his neck correctly without being incorrectly forced into a man-made frame.
I started Paragon as a 3-year-old, and since he was such a tall, gangly youngster, he needed this approach even more so than others. But it was a goodeye-opener for me to understand what horses are going through and what really causes the end result that we all love. I never put direct work into him being on the bit until I felt he had the appropriate amount of body awareness, core strength and balance to be there without resistance. With that training as his background, his natural talent has flourished and developed without him feeling pressured to do it. He has offered his amazing movement to me since the day he understood how to keep himself ready for prompt transitions at any moment, in any direction. Even going from his extreme extended trot back into passage is easy for him since he always first controls his center of balance.
Always remember: The frame of the horse should be the ultimate natural result of balance, reactivity and precision, not a means to an end.
—
Heather Blitz was a trainer at Oak Hill Ranchin Louisiana when she rode a broodmare she loved so much she decided to match her breeding. The colt, Paragon, by Blue Hors Don Schufro out of Pari Lord by Loran, stole Blitz’s heart and she decided to buy him. The pair has taken the small tour by storm, scoring as high as 76.7 percent at Prix St. Georges and Intermediaire. Their goal is to represent the United States at the 2011 Pan American Games and 2012 Olympics. Blitz is an international Grand Prix competitor and trainer based in Wellington, Florida (heatherblitz.info).
SaveSaveSave


